Banner Sponsors


For artists and collectors sponsored by Intercal...your mohair supplier and Johnna's Mohair Store
 Bears by Jodi
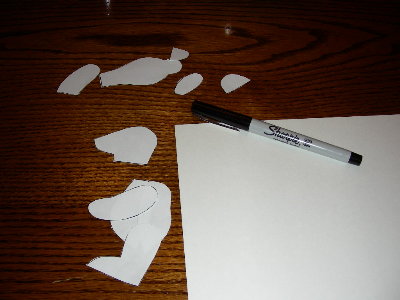
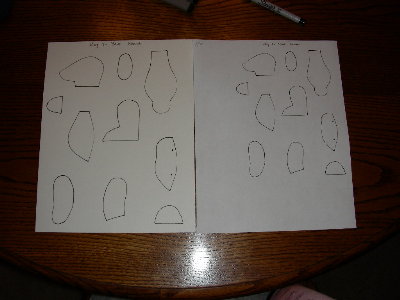 Here is the project I promised to share.I will do it in stages so as you new artists can follow and at the end I will share my finished bear. I chose do take one of my 5 inchers and shrink it down. So I traced out my 5 incher on to paper. Then I went to a copier machine. I told it 75% and it shrunk it down for me. I didn't want to go to small at first , maybe next time. Here we go !!!
See how it is not a whole lot smaller, But it really will be when I am finished.
Bears by Jodi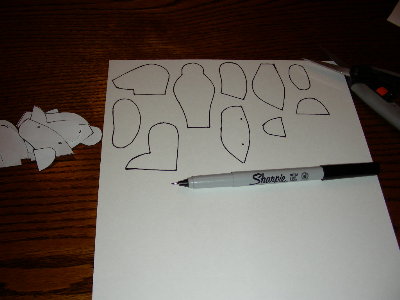
 I cut out the smaller pattern and then traced it to a heavier stock of paper so as the pattern will last longer.
Bears by Jodi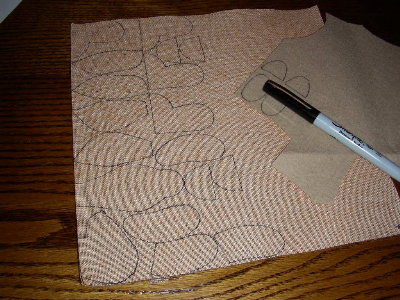
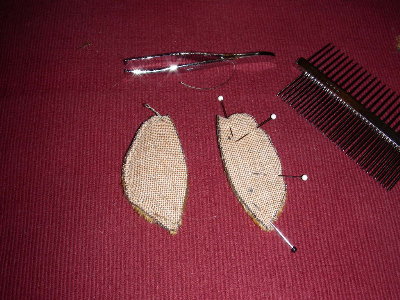
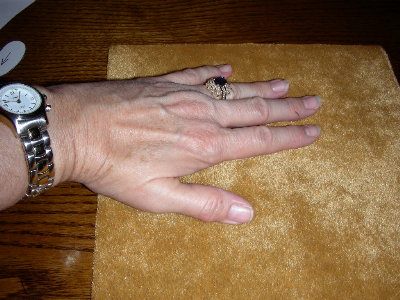 Next you cut out your pattern that was on the heavier card stock. Then I chose my Sassy fur and found the direction by sight but if you can't tell run your hand over it and the smoothest way is the direction of the fur flow.Turn over your fabric, and put a small arrow in a corner of the fabric. . Make that flow go with the flow of your fur so the fur will look natural when you get the bear finished.
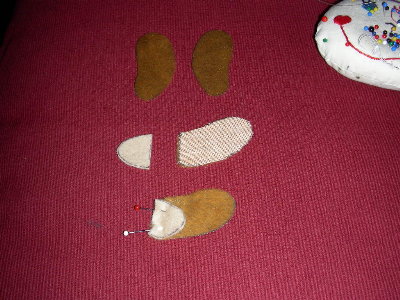
Trace your pattern to the fur following the fur flow. Flow should go down on the arms and down on the legs and down on the body. On the sides of the head the flow should go down but on the gusset you decide.Fur into eyes or fur away from eyes.
Bears by Jodi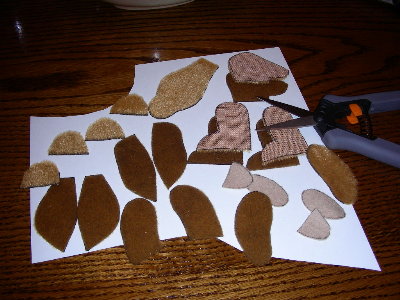 Notice in the last picture I also cut out my paw pads out of wool felt.
Now cut your fur out. I use fiskers. I love them . Just snip tiny snips from the back as to not cut through to the fur . Just tell your self you are only allowed to cut the backing. If you don't do very small snips you may cut the fur to short around the edges and cause a bald spot after you have sewn the bear together.
Bears by Jodi
 Now place sides of your head together. I start at the nose and sew down to the bottom of the neck.
Then I take gusset and start at center of gusset and tip if nose and sew down one side to bottom of neck. Then come back and start at nose and center of gusset go down the other side to bottom of neck.I use pins to help hold pieces together along the way.
Bears by Jodi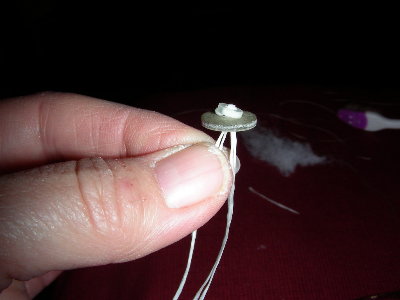
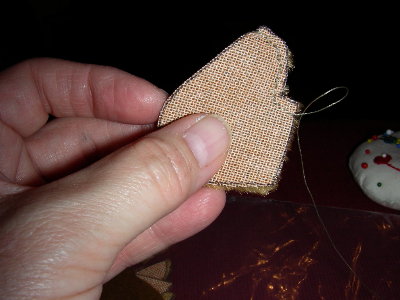
 Next I am placing body fronts together. Sew down the tummy side. Let it lay while you do body backs. Sew down body back and leave a space in the back big enough for you to turn it right side out and remember you need to have room to joint also. Make sure you leave a tiny space at the tops of both pieces so you can put your head joint through it. Now sew fronts to backs. I pin all around and I sew from center bottom to one side at the tops then go back and sew from center bottom to the top of the other side. When you get it done it will look like the last picture. Always place fur sides together before sewing!!
Comb any fur from the seams before you turn the piece. It will help your seams look smooth when finished. Mini's are harder but do it any way .You can use a comb , or pet comb or tooth brush , what ever works.
Bears by JodiI hate to do this but I am going to leave you hanging a while. I need to go back to sewing and taking more pictures. Hope you are enjoying the class. :dance:
Jodi falk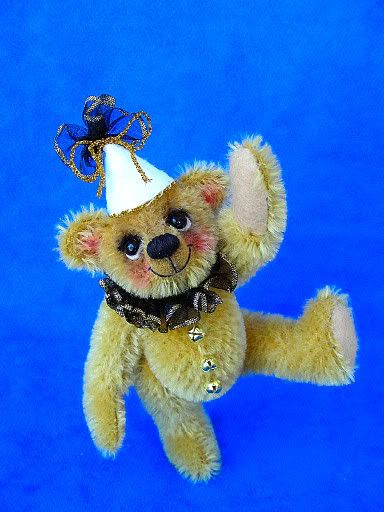
Bears by Jodi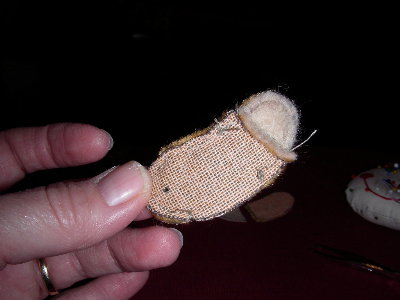
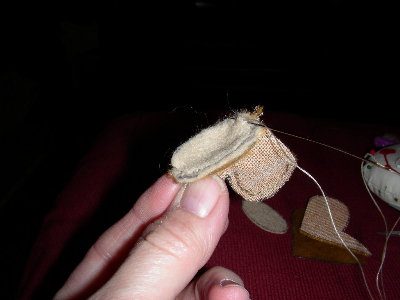
 Next step is the paw pad. You will be able to tell how to sew it together by laying it down and connect the pieces together There is a slight tipping up . Place fuzzy side of arm against bottom of paw and sew together. Right sides together. Then sew the out side of the arm to the inside of the arm. Right sides together. Leave a small opening at the back for turning and jointing.
Bears by Jodi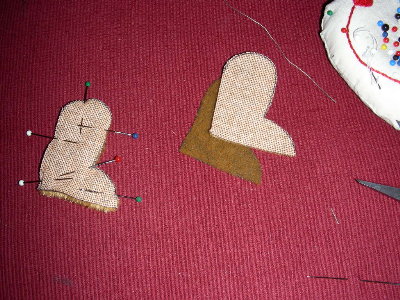 Next is the leg.Place right sides together.Sew from bottom heal to not quite half . Then leave an opening for turning and continue around to bottom of toe. Do the other the same and add the foot pad. Starting at toe and sew around to the toe again .
 Baird'sBears
 Great lessons, Jodi . . . can't wait for the next one
What size seam allowance do you use on a mini?
Bears by Jodi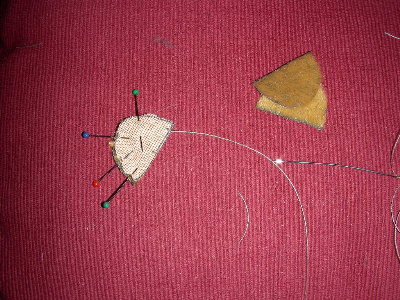 Turn the body right side out. I use tweezers to do this.
Next I have done the ears.PLace fur side to fur side. Sew the moon shape up around top of the ear leave bottom open to turn. Turn wip stitch bottom Leave that shape or fold bottom and stitch together end to end back to the middle. Leave a long thread attached to sew to the head.
Now turn body .
 JeannieB Bears
Now, where were you last month????? Just kidding! This is a great tool for beginners....like myself. I worked my first bear using tips from TT, a free hand sewing stitch guide and Tammy from Beckoning Bears!
This is a very nice thing for you to do! 
JeannieB
Bears by Jodi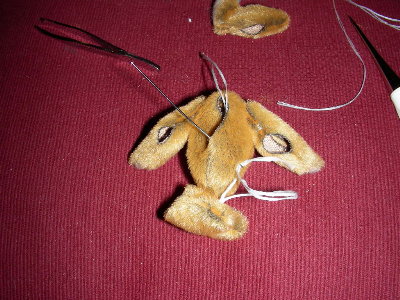 Now we are ready for jointing. I decided to use a hand made joint because of the bears size. I used waxed dental tape. It is stronger than dental floss. I doubled it used a small disc and a small button. Disk and button inside of arm,bringing threads through the arm, then bring threads through a hole you have punched into the body for the jointing of the arm and go through it and put floss through the disc then button when you are on the inside of the body. Square knot several times tightly. Do the same for legs and head. It works, I just came up with that method.See first picture.This is one side of the disc. Then it goes through the arm on the inside fabric on the inside part of the arm and thread goes through body and you place a disc then a button and tie off.
Bears by Jodi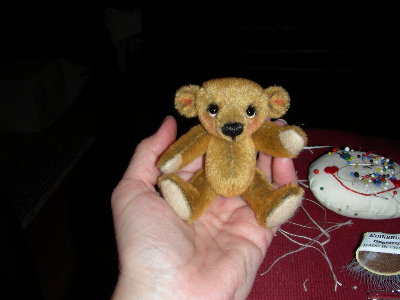
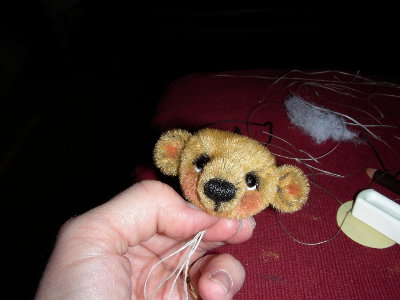 After jointing, then stuff your head, put on ears , eyes, nose and joint head to body. In the same way I did the arms and legs. This is where all the artist tricks are( the head) but if you have a question I will try to help.Stuff your legs, arms, and body. I use tweesers. Use small amounts of stuffing at a time and stuff firmly, and evenly. Ladder stitch closings on arms , legs, and body. Then You decorate bear how you want.
Bears by Jodi
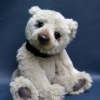
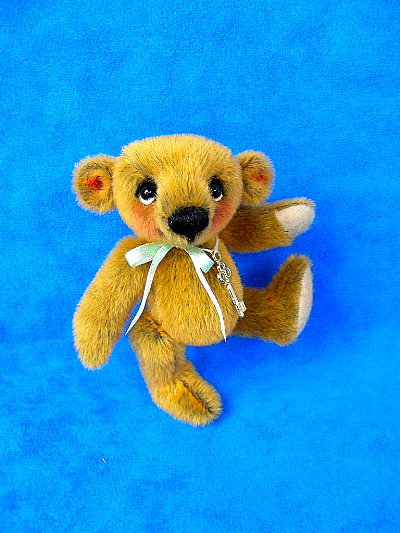 And last step Kiss your bear !!!!!
He measures 3 1/2 inches small. And his name is Petie !!!
Bears by Jodi
What size seam allowance do you use on a mini?
---------------------------------------------------------------------------
Just big enough to make sure you are catching the fabric on both sides. Look at the sides of the head photo.See how close it is?
Bears by JodiNow, where were you last month????? Just kidding! This is a great tool for beginners....like myself. I worked my first bear using tips from TT, a free hand sewing stitch guide and Tammy from Beckoning Bears!
This is a very nice thing for you to do!
JeannieB :)
----------------------------------------------------------------------------
Jeannie,
You are very welcome. I am not afraid to share. Even though you may see my pattern , it would never turn out the same. If I gave a pattern to 10 people we would get 10 different bears !!! No matter what. And If I can help you in any way I surely will. Bear Hugs I send to you !! I hope you can understand my directions. It has been a long time that I have been making bears and some things I am sure you would still like to know , so just ask.
Jodi Falk
 Charlotte Des Roches Designs
:clap: :clap: :clap: :clap: :clap: :clap: :clap: :clap: :clap: :clap: :clap: :clap: :clap: :clap: :clap: :clap: Wonderful Job Jodi...What great fun!!!!
Hugs &
Bears by JodiEven if you learn just one thing to day it has been worth the time I spent. I took a personal day today from work to finish for TT. Just could not bring my self to go to work with this project hanging in the air. But tomorrow it is back to work I go !!!  So I hope now some one else will do a project also. And it could be a doll , it could be a basket, it could be felting. I would like to learn that. I would like to learn how to felt on to a bears face. So ........ any ideas ????
Charlotte Des Roches DesignsGoodness gracious...would anyone like a "Start to finish Basket Project"???Just let me know....
Hugs,
Jodi, I think it was just wonderful of you to take the time to put together this tutorial. It will be a wonderful help for new bearmakers. There is nothing like actually seeing something done rather than just reading instructions. I would have loved something like this when I was first starting out. You are a real sweetie.
Bears by JodiJodi, I think it was just wonderful of you to take the time to put together this tutorial. It will be a wonderful help for new bearmakers. There is nothing like actually seeing something done rather than just reading instructions. I would have loved something like this when I was first starting out. You are a real sweetie.
*****************************************************
I am so glad you liked it. It did take all day but it was an act of love. I am a visual learner so I just wanted to help out some how in sharing with someone who just needed to see. Thanks again.
Jodi Falk / Bears by jodi
Bears by JodiGoodness gracious...would anyone like a "Start to finish Basket Project"???Just let me know....
Hugs,
*****************************************************
I would like to see a basket made, Any one else ????
Jodi Falk
 Jellybelly Bears
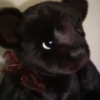
JODI!!!! Aren't you wonderful!! How generous of you to give a tutorial with photos and all! Isn't the face on your new little one the sweetest!!! Huge hugs :hug: :hug:
xx Sarah
Bears by JodiThank you Sarah, How nice of you to respond. I hope you enjoyed it . Bear Hugs...... I want to try another pattern in this Sassy fur. This little guy was hard to photograph, the pictures don't do him justice. Some times that happens on mimi's. They look much bigger than what they are. My sons girlfriend picked him up tonight and the most wonderful noise came out of her !! It felt good to watch her enjoy him. Thats the best part!! The smiles it brings !!!
Jodi Falk