Banner Sponsors


For artists and collectors sponsored by Intercal...your mohair supplier and Johnna's Mohair Store
I know this is a little late, but are you thinking about using cotter pins in the hands and feet to join them to the bear body? The only method I can say actually works for sure is e600 glue to glue into the wrist and ankles.
The library is a great place to check though! There seems to be a post about EVERYTHING under the sun in there!
Actually, as a girl from southern Ontario, I prefer ordering from intercal to be honest, they ship well , and their fabric really is great. Second, I use a lady in Australia and oddly enough shipping costs are lower! The only other option I use for fur suitable for mini bears is Etsy , with the filter turned to Canadian suppliers, you can get really lucky!
Bait or jewellery silicone? I never thought about that! Finding the right silicone is hard and I managed to get some... But my husband got to it first xD I so desperately want to try this!
Hi there! I just thought I'd throw my minor experience into the ring here. Before starting teddies, i started with clay featured plushes, andthe joining of clay to armature to fur was.. challenging. I bake my clay pieces straight onto a braided wire skeleton, and after cooling i glue a layer of fur around where metal meets clay (ankles, necks etc) using either a really decent hot glue or an epoxy, both seem to work pretty well. And then guesstimate the fabric sizing with a lot of pinning and basting stitches before sewing what seams i can on the machine and ladder stitching the rest.
For smaller claw features plushes ive also added wire loops to the clay bits like the loop on a glass eye, sewn the body traditionally, string jointed the clay pieces together and then glued a fur or lace detail around the wrist/ankles/etc. For the heads of smaller ones i add a thick neck piece like youd see on a plastic moulded doll head, if that makes sense 

SueAnn has the right idea! A totally green chemical free way to clear up the problem. 
Thanks, everyone! I was pretty timid pairing the fabric!
Oh he turned out beautifully!! I'm so jealous!!
So... This is the mohair I was terrified to use, a tiny square of custom dyed kid mohair I ordered from Australian Bear n accessory sellers, Emma's Bears, paired up with some lovely stuff donated by my benefactor to give me the courage to actually cut the stuff! And I adore how she came out! Or maybe I'm just biased towards the colour.... (I keep the same fuchsia in my hair to make sure the kids can see me in a crowd  )
)
Now I just wish I could get internet into this old farm house so I could use a camera that might do the colour justice, in the meantime, here's some cell phone shots in the only room with some half decent lighting!

It definitely looks promising! Brings the parade of prints you might see leading through the woods on Teddy Bear Picnic day to mind! 
The only thing I personally may have tried out, and you may have done this yourself, is make an attempt with the hint of claws, maybe simple little tiny ovals st the toes. But that may push it entirely outside the teddy category and push it back into cartoony realistic.. but I personally think your paws look pretty nifty!
Thanks so much, ladies, your encouragement means a lot to me!  I really hope to be able to create on the same level of skill you all can one of these days! (I've got patience , I know it won't happen overnight )
(Sorry for the delay in response ! Semi on vacation... and preparing to move at the same time. Kinda counteractive!  )
)
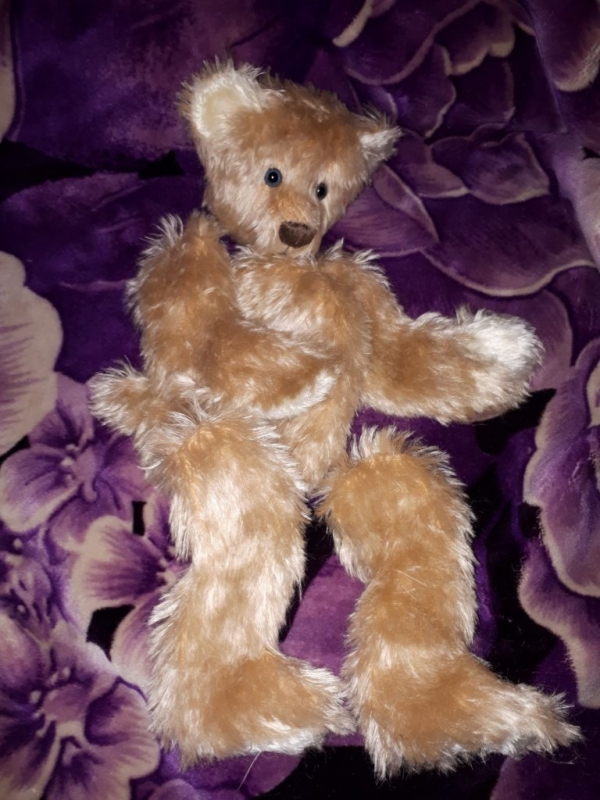
Well, I did it! I finished my first mohair bear! Thank you so very much to my new Southern neighbor for giving me the chance to jump right into creating without fear and proving that friends can be made anywhere! And a special thanks to Sue Ann for the lovely TT "Goldie" pattern, which this handsome little guy was made from. (After looking at the other Goldie's in the gallery as proof that amatures could make beautiful bears out of it, I knew any flaws were going to be no ones fault but my own, and that was exactly what I was looking for in a pattern!)
So here he is! Joey, or Joseph if he's been a particularly naughty bear! Feel free to critique, but please, be kind, or better yet, suggest how I can fix my mistakes!
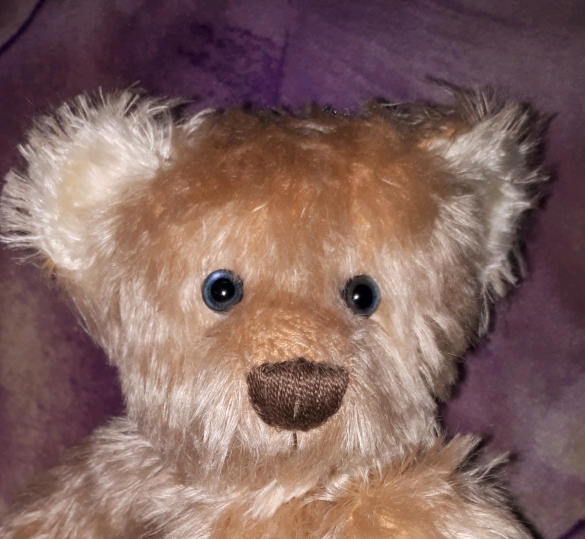


 Joey is buck nekkid here, but he's getting some custom made clothes before heading to his new home with my Grams!
Progress Report! (Update)
Thanks to an absolutely amazingly kind gesture of a wonderful person, (whom I would love to name but won't unless given their permission), I was gifted some pieces of mohair in an array of lovely densities and colour so I could stop completely panicking about ruining the limited amount I did have and learn the difference between the properties of synthetic faux fur and mohair! This person may have hung the moon, in my opinion, I've never been graced by such a wonderful gift given souly because someone was blessed with a sweet and generous personality!
So... I did indeed use the lovely Goldie pattern SueAnn donated for practice since I knew it was tried and true, and without the fear of failure my fantastic new stash of mohair freed me from, I went to town on working on this little bear!
What I learned: While synthetic furs, even the high quality ones, are wonderful to touch, they all have a bit of stretch, some minor, some hugely distorting, which indeed affects how the bears features turn out and can, if your Not careful, change the entire shape depending on how you stuff. A mohair bear can be distorted with a sloppy stuffing job, I've found out that quality mohair is much more forgiving when it comes down to it because it doesn't stretch to the same degree. It generally can be trusted to stay in the shape of your pattern, and not warp at seam lines! This means that you must be accurate with the tracing and stitching of your pattern... I admit to having a few seams I had to , but all in all, the mohair responded wonderfully. I wasn't expecting that sewing through the backing would take a little more push than the softer faux fur backing (though common sense should have clued me in  ) it was still easier than messing with real leather!
Here's a sneak peak of my progress so far, though I think my Goldie definitely ended up being a boy. I'm thinking he might look like a Joey, Louie or Ernie/Ernest! He's by no means perfect, but I'm extremely excited about how he's turning out! I want to try eyelids on him too! Which has been the only thing that has intimidated me this time!
 I'm stuffed, unjoined, but I added a tail!
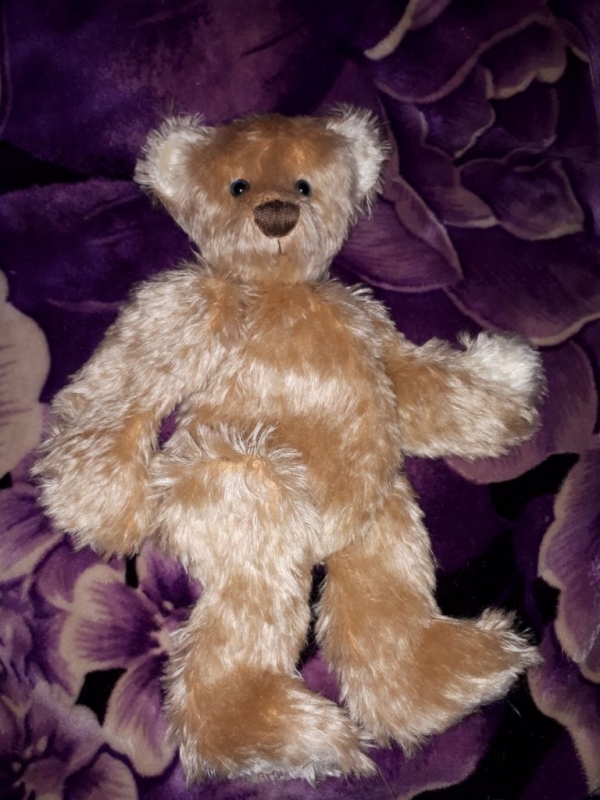
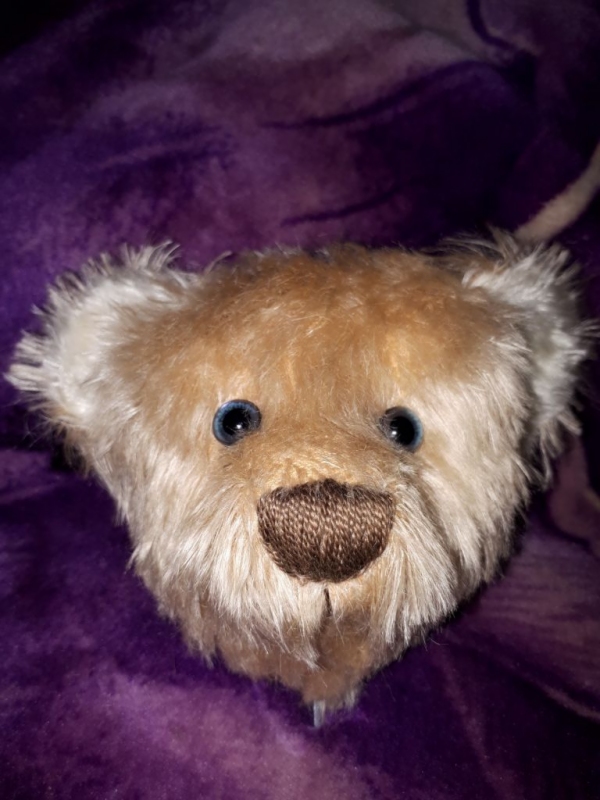 I'm almost pleased with his nose! But his fur has given me a touch of trouble with its wavy texture to shape it. I really like the scruffiness tbh!
Glue can actually be your friend! I've used both superglue and liquid stitch stuff to attach clay horns and such with pretty good results. The gel superglue worked best for my purposes, but as long as you use a thin layer spread evenly, it shouldn't stiffen up horribly. The only thing I found to really watch for is bleeding out around the edges.. with felt, maybe needle it in around the edges? I'm not entirely sure how the experts get that perfectly smooth transition from felt to fabric, I've been needling straight to the fabric, but I'm failing at the smooth edge so far
I've never thought of a felted skeleton!  I use poly quilt batting wrapped around wire, which is just super quick. I'm still working on my basic shapes, I don't know if I could pull off a felted skeleton!
You have no idea how much your opinion means to me! Thanks Becky! What a fight this little gentleman was! 
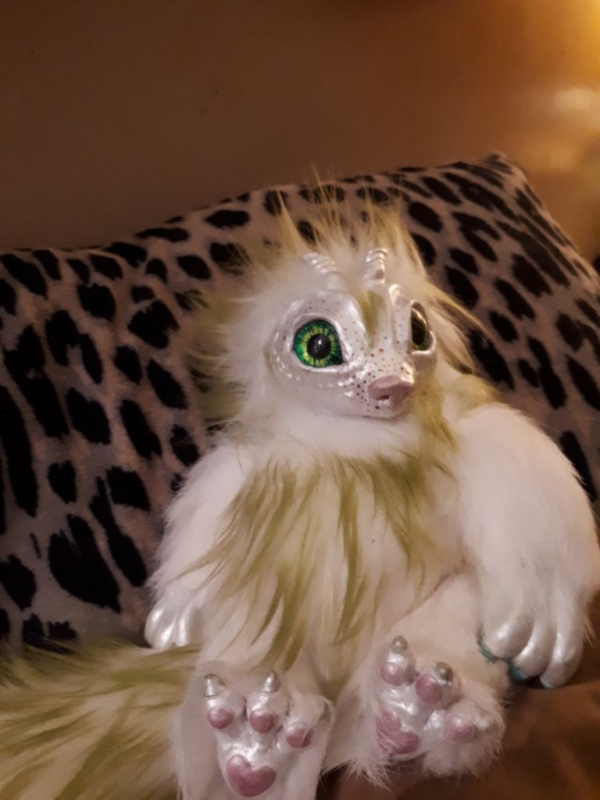
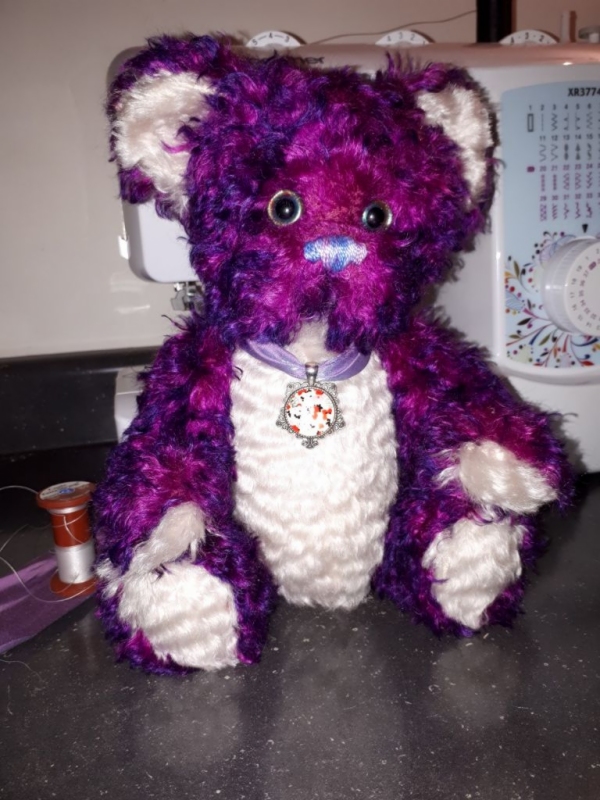
I'm.... actually happy with how this Ewok like purple guy turned out! (Emma's Bears Sugar pattern) This long pile is killing me! But my daughter loves him, and his head stayed on... WIN!


Sorry if I misunderstood but are you asking about creating a skeleton out of just wool roving? With out the wire?
I just started experimenting with needle felting my teddies (mostly to try to return some facial expression to a bear I trimmed a bit short ) but what I've picked up so far is if your using faux fur, trim the area well, I find the natural felting fiber doesn't mingle well with the synthetic , and it helps to stuff the area your adding felting to with roving. I've heard it's a bit easier with mohair but I haven't had a chance to try it myself..
It's not much, but it's less than nothing, but I hoped it might help, evening just a smidge
Lionel! I love it!
I just thought of something. If you wrap your loc-line in batting before stuffing the area around it with your other filler and needle sculpt the paws, stitching through the batting layer as Well, it should hold it in place. I took a moment to put some thought into the process I use, though I actually prefer wire over loc-line, but the theory would still stand, I think, and all I use is simple paw line definition. Hope that helps :)
And would you be so kind as to share a picture when you've considered him to be complete? He really is sweet!
That was going to be my suggestion as well, more stuffing, or a single stitch around the wire loop in the paw at the seam line!
And if my two cents are worth anything, I see a really well done polar bear too
Are you using loc-line armature or wire? And do you mean it's loose where it meets the shoulder or the paw?
What a lovely picture! My family were knitters, so my grandmother had knitted a fantastic Kanga and Roo for me when I was a little girl.
Ha! That's exactly what I did, except I used tinfoil and masking tape, since I was a little short on plastic wrap. I love the horse head tutorial, that looks like it could produce a pretty accurate plush! For my pattern I definitely simplified the shape so I could match the head to a more teddy like body, but the problem now is the fur I used is grey at the base and brown tipped and pretty short, so the double jointed neck I had incorporated.. well, the grey where the pile direction lays at my top cut of the neck wedge is showing easily beneath the brown of the bottom of the head layer  trying not to be frustrated, but grrr!
But thank you so much for sharing! I'm definitely going to be giving those a closer read to see what I can pull out of them!
So I've been having a bit of a hard time with getting my traditional teddy's turning out half decent looking. (As can be seen quite clearly in my intro thread post  )
)
So... I thought I'd take a step back to what I know. Clay. After reading through some of the library I got the idea from some previous posts that maybe I should use some reverse engineering to get the shapes I'm actually looking for without butchering well known artists bear designs and reducing my expectations of my bears to look like the absolutely perfect finished creations the original artists are capable of while I have none of their skill or techniques.
Not finished yet, but the cotton first try turned out pretty good, but I didn't like my darts curve so I did some refinishing and cut the head pattern down to (up to?) 5 parts to get the proper dimensions... I've probably over complicated it, but I'll worry about simplifying the pattern after I succeed. Being impatient I'd like to see what he's going to look like furred out!
Am I getting a bit closer to the right track? I know it's just an unfinished head but I thought I'd show someone before I went and mangled it some how
 The clay head I used as a template
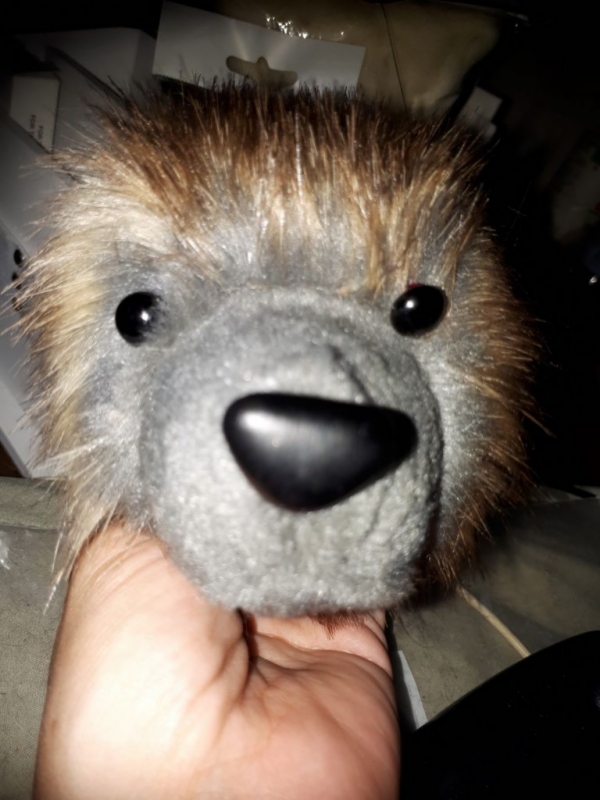 Unfinished soft head
What about one of these?
VISCOSE -
Melon
https://www.intercaltg.com/colors/701Sh.html#701S-1
Wheat
https://www.intercaltg.com/colors/533Sh.html#533S-10
Or if your looking for an already well loved look you'll have more colour range from the other types of viscose, such as the curly, matted or the blends...
Honey tan
https://www.intercaltg.com/colors/340Sh-1.html#340S-42
Sand
https://www.intercaltg.com/colors/472Sh.html#472S-1
Caramel
https://www.intercaltg.com/colors/711Sh.html#711S-10
The one I think looks the most whinny-ish would be this matter curly viscose. I personally don't know what the texture is like since I use mostly synthetics, but the colour looks close
Butternut
https://www.intercaltg.com/colors/497Sh.html#497S-1
Hah! I'm.... trying... to make bears. I wouldn't say I'm succeeding just yet, but the enthusiasm is there! And seeing wonderful creations like yours makes me wish I knew the secrets!
Oh, she's beautiful, Heidi! So much majesty, and yet I could easily picture her sliding around on her back through a field of dandelions as carefree as the wind!
If I hadn't spent a true fortune on trying my hand at this fickle craft, I might have been able to give her a home! I'm not sure if that makes me want to double my determination or kick myself in the butt and cry!
Fantastic work! (I for one wouldn't complain about more pictures of this pretty girl!)

