Banner Sponsors


For artists and collectors sponsored by Intercal...your mohair supplier and Johnna's Mohair Store
Randy - as always, you gave perfectly clear, useable information!!
I rarely use Crop-to-a-particular-size, but I've copied off your set just as a backup and put it into my PS manual.
Thank You!!
(Do you happen to know anything about Blogger/Blogspot?? I'm about to request info on that!)
Welcome to you, Mammabear - one great thing about this forum is that you will find every one from the very first beginning teddy bear artists to the brand-spanking-new members like yourselves, and somewhere in here are the answers to every one of the questions you'll think of - - - you need only ask and someone (and more than one) will point you in one of many directions for a solution!
Do pop in often!
I loved this synopsis.
Noon - 2:30 PM Central time seems to be their most active time.
I had no idea that Hope was (allowed to? needed to?) nurse as well.
Bear.org certainly showed us the highlights from Sat; this is the most action I've seen in a 10 minute span.
TY, SueAnn!
I made the mistake of using it straight from the container on bear noses (fabric bears) years ago, over thread-sewn noses. I carefully painted it on, layer-by-layer, to a nice fat little button of a shaped-nostril nose, letting it dry a day or so between coats. It was crystal clear and looked great on little 2" - 3" minis.
HOWEVER! - 2 teds in particular, happened to be sitting in my open basement workroom awaiting the next show, and we're rather humid during the summer.....
The noses had 'sheened over' and turned mostly milky-looking inside the depth of the glossy build-up. I'm very happy that these 2 were waiting for a show rather than going right to customers, so I could paint over the Mod Podge. This saved me much embarrassment!
No water in the den- yet!
Here's today's update -
Let’s Name those Cubs!
Team Bear has kindly offered to run a ‘name the cubs’ contest. The complete rules for the contest are at Contest Rules. But, in short, here’s their plan.
Everyone email names to cubnamingcontest@gmail.com between 11:00 AM EST Thursday (2/17) and 11:00 AM EST Saturday (2/19).
Each person submits two names; one for the female and one for the male.
Please include your own name and complete mailing address with your submission.
Only one submission per person.
At the end of the 48 hour period, Team Bear will tally the entries and make a ‘Short List’ of the 3 most popular female names and the 3 most popular male names. They will send those 6 names to us for approval. If we have to remove a name like Stinky or Terror, the next most popular name will be inserted until the ‘Short List’ is approved. (We know you wouldn’t name Hope’s sister and brother those names.)
On Sunday (2/20) at 11:00 AM EST, Team Bear will draw a fan name from the emails submitted. The winner then has 24 hours to select two names from the list, one for the male cub and one for the female cub. The winner gets a certificate of honor and a copy of “Lily & Hope – the Light of the Northwoods by Olatz Azcona Munarriz.
On Monday (2/21) at 8 PM EST, Team Bear will announce the winning cub names. We’re anxious to see the names you come up with! This will begin a new era in the saga of Lily, Hope, and the cubs.
Thank you for all you do.
—Lynn Rogers and Sue Mansfield, Biologists, Wildlife Research Institute and North American Bear Center
I saw the video of Hope gently tipping her head over to disentangle the cub whose claws had become trapped in her fur, instead of just swiping at it to pull/push it off.
Such a gentle Big Sister. Such patience she's instinctively learned on her own! I really give her credit!
http://www.northlandsnewscenter.com/new … 83269.html
Ted & Lucky are also a comical pr to watch, though I've never seen Honey live on camera.
Their story is amazing too.
http://www.youtube.com/watch?v=vjWqpsSj008 (2 days in a row; out for 7 hours - she wants to Wake UP!)
http://www.bear.org/livecams/ted-lucky-cam.html
http://www.youtube.com/watch?v=VQW2MBfzPl4
Now you all prob knew this but I just learned this today!
http://www.bear.org/website/the-nabc/me … ml?start=3
Amazon (Used) Books list several as well; the first place I check when looking for a book - - -
Both clothing FOR the bears as well as the bears themselves. Crochet too,
And I've seen Betty Lampken (sp?) continue to advertise her patterns/books Knitting for Teddies in the US magazines since I began in 1990.
http://www.amazon.com/s/ref=nb_sb_noss? … rs&x=0&y=0
Googled Betty - found many listings for her & website -
http://search.yahoo.com/search;_ylt=A0o … ype_param=
http://www.bettylampen.com/store/store.php
Written in 2010!! A very nice story!
http://www.mominventors.com/2010/06/01/ … ing-books/
Definitely - turning the tables on him!
Promising to wash the car for him twice this summer - keep the tank filled for 4 weeks in a row - taking for its next oil change on YOUR day off - anything that he normally does on a regular basis. DRaw up or print out a coupon booklet as Tami suggested. Most fellas appreciate a role reversal!
We found the booklets we gave our folks when we were first married, in their effects when we closed up their homes - they proudly displayed them for years on their desks and never once 'cashed' them in!! LOL
It sped by too quickly for me to take it all in: the stories, the details, the fabrics, notions (even the different pins!) and the facts of each child and the raw emotion that some of the mothers endowed into each scrap.
I made screen captures of each piece, so that I can linger on each one and read each in my own time.
What a grand memorial to the spirit of humanity and the will to SURVIVE!
Thanks Ruth for bringing this to our attention - wish I could see this in person!!!
When I worked at our LYS shop in the 80s I had bosses who treated any employees they thought worthy of it, to courses that gained us teaching credentials with the APNR - Amer. Prof. Needlework Assn.
I think our bosses wanted it for their own glory actually! One of the courses I took included all styles of needlework: embroidery/needlepoint/white work/pulled thread/etc. All of it required very careful counting - and young eyes!
So when I began stitching on the Malden Mills white grid-backed fabric, that felt almost like Gros Point cloth. It was huge by contrast and was no problem finding the rhythm in stitching, compared to combining stitching petit point on linen at 24 per inch warp/weft count thread fabric.
Here are few of the terms defined:
tight running backstitch- If the Back Stitch is done well, the word tight wouldn't be needed, as it is—by nature—tight.
Jane's and Shane's lettering examples are both correct, in that they advance one step forward and go back half a step, the only difference is that Jane worked Left-to-Right and Shane's going Right-to-Left.
It's a matter of personal preference and to some degree, whether you're right-handed or a lefty. And whether you like to hold the fabric with the seam fanning out around the edge away from you as you sew (with the work in your lap) or you like to hold onto the seam and have the work away from you: the fabric off-your-lap if you follow my meaning.
As to the running use, the stabbing method gives a better result. As this stitch is meant to be done in very short widths—next to each other—with one exit hole being used as the entry hole for the next st, this necessitates keeping the sts quite close to each other. We miniaturists have the advantage in learning to pace ourselves, by placing the sts into the grid system on the backing of the white mesh. And needlepointers and other needleworkers learn this pacing from repetition: the problems arise from working too-long stitches because it leads to puckering when the sts are pulled tight.
When the sts are placed immediately next to each other, one step forward & a half step back, (repeat.. repeat..) it's 'almost' impossible to pucker the fabric because the sts are placed more closely than the warp & weft of the fabric threads are. Figuring out this balance between the weave of the cloth and the stitching is what it takes to work out a nice smooth-yet-tight Back Stitch sewing.
Stabbing is always the best way to employ this stitch. Used in either direction, it means that the needle enters the fabric at a 90° angle to the surface of the fabric and the thread is pulled completely through in that direction and straightened and snugged up in place, before the needle is placed back into the fabric back again from the opposite side at a 90° angle to the surface, repeating the process.
This is the best method for keeping napped fabrics from shifting.
Running stitching will have the needle enter and exit the fabric in one movement before the needle is released at the eye end and picked up again at the tip, to be pulled through the cloth. No matter how much it's basted or clipped, some amount of shifting always occurs along the seamline, especially with napped fabrics.
The diagram you have, Shane, is a needlework stitch but not the Back Stitch. It would really be difficult to keep any tension on the thread and not have it pull the fabric into furrows or creases because it's pulling the thread over 2 to 4 warp threads - impossible to tighten. Thx for looking it up though, your first example of C A B which you use is best!
I would be right in guessing that your sequence to follow would look something like this?-
H G F E D C A B
and you'd stitch A back to B (half step back), B forward to C (full step forward), C back to A, A forward to D, D back to C, C forward to E, E back to D, D forward to F, F back to E, E forward to G, G back to F, F forward to H , H back to G, etc..
A 'running backstitch' can be a good temporary basting stitch substitute, done with larger than actual finishing sts, near the real stitching line and not be in the way like the ends of pins and clips can be later in stitching. It'll also help follow smooth and tight curves better than any other means of affixing 2 fabrics together while stitching.
The Doubled Thread for stitching isn't what leaves the larger hole in the fabric but the size of the needle pushed through it, along with the size of the eye, if that's wider than the needle. The threads are much finer gauged than the backings of all mohair/alpaca/fur/etc and miniature ted fabrics, unless you're using doubled upholstery thread on thin cotton fabrics. The fabric usually closes back around the thread; sometimes the sizing in the fabric keeps the holes largish, but you can flex the seam lines in your hands back & forth to break up the sizing's stiffness and that should cause the warp & weft fibers to close around the sewing thread.
I have large hands and needed a large needle—I always used a John James Embroidery #8 & #10 for stitching noses. They're about 1⅜" long and not especially thin but have a large enough eye that I could thread the relatively firm Mettler's Metrosene Plus Polyester thread through easily, as well as just barely accommodating a single strand of Conso and Mastex upholstery thread in the #8 so I could double it over for jointing. If you're finding wide holes, try using a thinner needle (larger needle number) but try to not use a needle which has an eye that flares wider at the eye than the needle, like some of the Gold Eye needle have. (sentence structure! - the grammar police can cart me off now!!)
Hmm, now you've got me intrigued - which is good!
Go for it - and let us know when you put the bear in the Gallery section, too !
We were typing away at the same time, Janice-marie, though you're doing it 'tomorrow'!
No, I don't think you're infringing if you also include a gathered tummy seam: there are too many different ways to accomplish this.
Is yours going to be an absolute duplication of the one you've seen?
Are you using it just to gain puffy fullness instead of darting or to replicate the look that it gives the particular teddy you saw?
You have to examine your reasoning and the 'look' your seam/gathering will give, (hopefully it's different) to make sure that it isn't the same.
Most darts are placed in pretty much the same spots as everyone else's and those aren't infringement.
Gathering seams may just happen to be newer and a novel approach.
Take a technique and make it unique, that's all.
And Thank you Randy- I had a college girl friend here last week too, both Sarah and Neal were using a bit of that (your instructions are very familiar to me know that I see them in print form, I recognize what they were doing on the monitor from following your wording, I've printed out both of these for reference as I need the back up of seeing it in step-by-step print) and that's how they both got that nice 'crisped' faded edge; it appears crisp because you don't see the little bit of faded edge around your ted's fur.
I did look at that Layer Mask as an option after I has laboriously drawn around the sheep motif several times (the tool kept jumping ahead and connecting when I was nearly done and I had to start over again  )
)
I'll try your way too as I want to cut out the fence/ribbon border to use as another element. I hope to combine all of them at one point or another.
Once you get familiar with a set of steps to tweak pix, I can go through my 10 or 12 per image in less than a minute and find that after 6 or 8 years I never vary my investigations - and PS does so many other things.... Never seem to take the time to crack a book open or even experiment w/the other tools that just sit there!
It's on my list as an addition to my 'Year of Writing - 2011' though, this is a good start!
I'm glad you two were up late. Thanks again for solving part of my headache!
Ahh Nancy - the 'Missing' step! It all comes clear now-- I was supposed to click New Layer from the Toolbar word - Layer along the top, not anywhere else that I see 'Layer'.
I DO remember that now, I just totally blanked on it all day.
I'm heading for bed now with my aching head and will start fresh tomorrow - THANK YOU, MUCHLY!!!!!
That was great, I can see why you're in charge of teaching: Clear, Simple and Succinct!
hggzzz - B
My Photoshopper son has had oral surgery and is down-for-the-count.
He ran through this last week with Ole Mom but somehow I knew this part wasn't going to stick; he zipped through it too quickly for me to write down all of the steps. And I do mean that I need to write down every single keystroke until it becomes routine.
I'm creating a banner from different Layers and it's the creation of NEW Layers that has me stymied - unfortunately I lost one of the master copies I had last week and needed to make another.
I have used the Magnetic Lasso Tool to draw around the object I want to capture... now what?
I don't remember what Neal did to turn this into a transparent layer.
Nothing is movable/drag-able/transferable.
Nothing is showing up in the Layers 'History' though every time I click on New Layer, a new one appears under the History Tab above and under the Layer Tab - but they're empty.
Does anyone have a relatively simple explanation for what I'm doing wrong or missing?
I'm sort of under a time clock. I made one last week, with him here, but it ended up 500 pixels wide and I need it 800, so I have to start over and size everything all over again; good practice—now if only I knew the pathway
(No, I don't even want to know about Paths!!! LOL)
It's the Sheep postcard I have cut out ready to move onto the background....
LOL - That's the exact sequence that I was making screen captures in - nice to know that others were recording the same record-keeping moments, though it's definitely clearer to see in a film than in still shots.
Is Hope nursing right now? Lily is actually resting her head on the rim of the den, and then placing it down inside, alongside Hope's which doesn't move away from Lily's chest area. There was even the slightest hint of a reprovable growl directed toward Hope, though she licked her neck, right along with grooming the new cubs, which are out of sight.
This is the first time I've seen & heard every one awake & active!
Ohhh! Everyone just did a whole move around - Lily reached out to build up the lower lip by drawing more straw in. That left the cubs w/o access to their food and warmth, they started screaming. No ministrations from Hope would calm them and for a full minute or two all 4 were in sight. Hope then lay down with her back covering the front of the den.
While I was typing this, there was some unrest and the cubs were unsettled, everyone got up and I captured a good shot of them again. They look to be somewhere between 6" - 10" but it's difficult to tell from the cramped conditions in the den.
Hope moved to the back, Lily's head is in front again but the wind was surely more blocked when Hope's backside filled the front entrance!
Ooops - everyone's moved around again - the cubs are very unsettled today!!
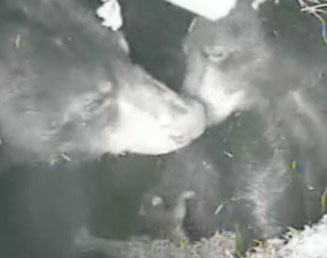
Mom & 1st Daughter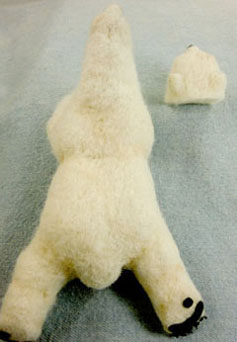
Raking in new Straw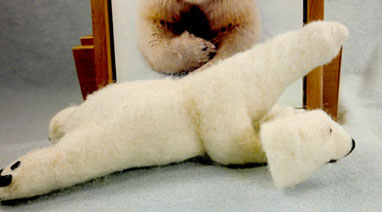
Hope (on the right) has her nose pointing right at one of the cubs.
Lily's head was on the left, trying to get them groomed and settled at the same time:
One cub crawling up Lily's leg, straight down from her muzzle (it looks a little like a chipmunk!)
Both cubs here! one looks dark (the chipmunk one) and one light - the one in the side view. It's seen that their eyes are still closed.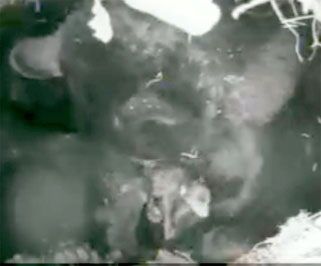
Getting settled - I think this is the darker/chipmunk one, as it's 'diving in' in-between Mom's legs to latch on. Those two little feet and the stub of its tail were so cute!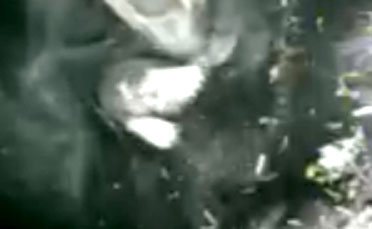
Weeeell? We're so waiting for a report.
Has she survived the COLD trip North?
How is she settling in?
ARE YOU GETTING ANY SLEEP, New Mom???
I'd love to hear when you have anything to say, Pat!
Hi Andrea and all, I've actually had several email conversations with Glenn over the weekend. I have to give him kudos for being a fast responder!! This is the latest from him just this morning:
Hi Bobbie,
Many thanks for your generous compliments and thanks too for mentioning us on Teddy Talk - I've had several people get in touch already as a result.
In case it's helpful for other Teddy Talkers, the focus of the project is to gather the stories of every bear maker/artist with sample photos. The style is like the feature many have on their websites 'About the Artist'. We created an entry for Hugglets to give the idea (we used to make bears in the 1980s).
The Hugglets system is designed to allow artists to be able to directly add their own story and pictures once they have registered a free site user account. It's also OK to use the form to 'Add a bear maker' although that is mainly for collectors to use to tell us about the makers represented in their collection.
If you get a chance to pass this info on that would be great.
Very best wishes,
Glenn
do we have to pay for this
?
As Glenn has said, it is free for anyone to post to, however to be able to view the Artist Sites/Views, one does pay a subscription fee equivalent to a magazine rate. One has access to the contact information about/for
(at this point) 10,000 Teddy Bear Artists but to get access to the 'website -looking' page, that would be the subscription fee.
This seems amazing to me: I look through the lists and after my 20 years here I recognize many many names, a number of which I'd forgotten about (or wondered if they were still in operation) and many which I'm 'meeting' for the first time. The numbers have literally exploded since the mid-2000s.
I can't understand how to change anything there or how to view the profile.
First, we are listed by our Company name, not our surnames.
To make additions, corrections or just to start an entry, here's how:
Here's the url - http://www.hugglets.co.uk/
Click on Bear Makers -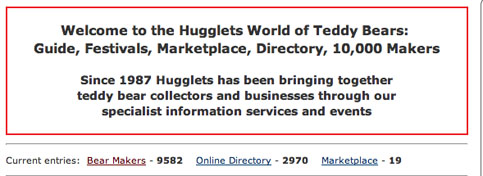
Click on Add a Bear Maker
Here's how to add a new entry not yet listed
I happen to be on Pg 46 - Creative Design Studio
This is my entry, another way to access data already entered:
Click on the button PREVIEW, to see the info already entered: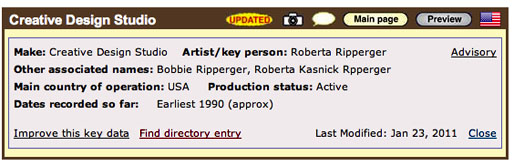
To change or Update, click on IMPROVE THIS KEY DATA
I'm going to go back in and change ('Approx' 1990 as I know I had ticked Exact the first time.)
Fill in here to correct or modify data: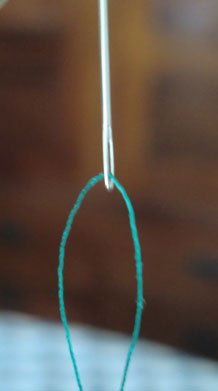
You're always welcome - just didn't want you to think you didn't qualify!!
After all, how many of us would, at the need for being involved for 25 years??
Only Beverley & Family and a select few others!!
to locate and enter the data on that many and more bear-makers over the 25+ years celebrating their time in the Teddy Bear world.
Yes, what that meant was the 25 years of the Jackmans' years of involvement: I should have made more clear who my word 'their' was referring to.
Any length of time working during this period is accepted, because there are places to mark off beginning and ending dates of your 'business', both for Exact and for Approximate.
If you know of an artist who's not listed it's allowable to enter the basic information on them; it can always be corrected at a later time period by the person themselves or by some other person who knows more of the information.
There are enough of us here on TT to put them (the Jackmans!) well over their projected mark!!
Seems I'm always late-to-the-party...
I just found about Glenn & Irene Jackman's 10,000 Bear Makers Project, to locate and enter the data on that many and more bear-makers over the 25+ years celebrating their time in the Teddy Bear world.
Did you all know?
Has it been discussed here & I missed it?
I found my name listed (by someone else - Thank You, anonymous soul, for thinking of me last May!) but no other info given, so I filled in a proper form and asked the Jackmans to delete the first entry.
I thought you'd all like to kick up their numbers: there's even a place to post 2 images of your work! There are 9582 entries listed now, if I'm remembering correctly.
Here's the url:http://www.hugglets.co.uk/
Click on Bear Makers and locate Add A Bear Maker in the middle of the next page or search by surname to see if you're already in there first.
Ahhhh.. the 'eyes' have it - Haven't we all come ever so far in the last 6 - 8 years in developing the most excellent techniques with the EYES??
Outstanding work, everyone! It's going to be so hard again this year.
And Krista, I'm really glad you got the opportunity to post a entire, larger image of Bella: when I first saw her in your avatar, I thought it was 'Grandma Wrinkles'!!!! LOL (anyone else see the resemblance in the pic now???)
I love your EZ to navigate, 'clean' looking site, Richard.
You've ACED 2 things in my book - do you realize that there are some websites designed by teddy artists who don't even state their full name?
And in your picture - it looks like you're wearing a crown, so I dub thee - Sir Richard!
Or do you prefer Lord Richard?
King Richard???


