Banner Sponsors


For artists and collectors sponsored by Intercal...your mohair supplier and Johnna's Mohair Store
 Creative Design Studio (RKR4CDS)
Someone asked this question yesterday and I got sidetracked into replying about the lighting and photo studios.
The question or observation was about the pic appearing at the top of the post but not being able to see it until the post was submitted.
Believe me, MANY of us struggled with this one! You're not alone!! It took me a long time to figure out the differences between top-of-the-page and set within the text where one wants it placed.
There are 2 choices. As you look at the place to type your reply, you'll see 2 spots to pick Img Upload/Upload photo(s) from your computer.
If you want the pic to appear at the top of your post but not be seen while you're typing away, pick the choice UNDER this typing box; the white Button that says 'Choose File' written right underneath the "Upload Image(s) from your computer"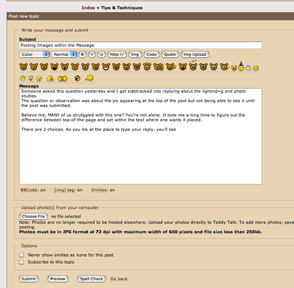
If you want to place it at a particular spot in your reply, and add more at any time, choose the Img Upload button above all of those bear faces. That will open a small pop-up window that says Choose File.
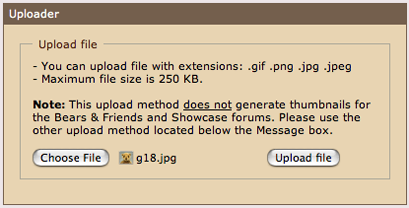
Clicking it opens up your hard drive, you click on one and then the button to the right of it>Upload File. Another Box pops up over that small one saying 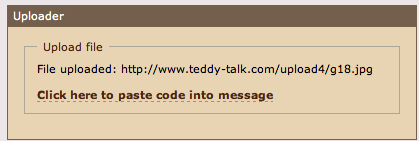
Click that dotted line of text and your image will appear right where you want it!
Sorry if this was too elementary for a lot of us. I asked it many times and got answers that make perfect sense now, but in the beginning I need to see exactly what & where to do the steps, until they became familiar.
A pic is worth a thousand words!
__________________________________
And now a question of my own: in order to stay lower than 250 kb, I have my res set at 72 in Photoshop and just dail down the width pixels until the kb is 250 or lower. My images are always smaller than, say, Judi's TITA entries.
What should I change to increase the size and stay within the parameters?
The res?
The Image quality? (I set that at 7 or 8 for 72 res/online pix and at 12 for 300+ res for print.
How can they appear larger, stay crisp and honor the size guidelines?
Creative Design Studio (RKR4CDS)Actually there's another way to upload an image: in the middle of those text options above the bear emoticons, there's "Img".
I've never used that one after I found out about selecting the one at the end of that whole row, in the upper right corner in this Quick Reply or Post Reply box.
Bobbie, thanks so much for that great tutorial; it's appreciated.
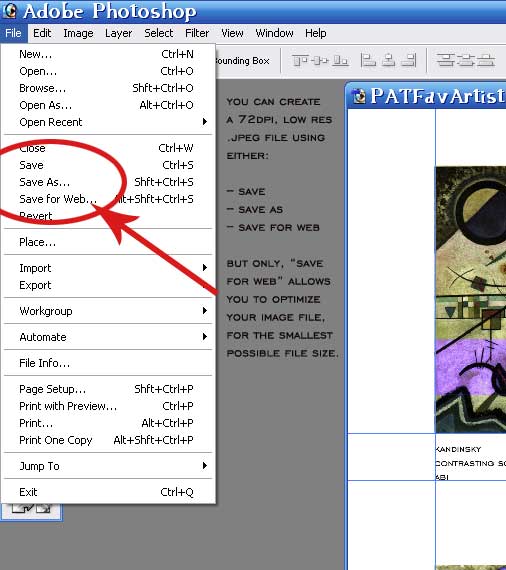
I just read your question quickly but I'm wondering... When you save your images prior to posting them here, do you SAVE / SAVE AS your files as .jpgs, at 72dpi, in your chosen dimensions ... or do you SAVE FOR WEB?
When you click SAVE FOR WEB you allow Photoshop (or whatever program you use) to "optimize" your image files. I'm not sure what this means in specific technical terms. But for our purposes, what "optimize" means is that a 72dpi, 5x8 inch image will be, say, a tiny 50kb in size... instead of a much larger 800kb, or even in some cases for me, because I start with huge pictures, MEGAbytes!
In other words, when you "optimize" for web, you can post larger photos and take up less server space doing so.
I have Photoshop 7.0 (a prior, full version) and don't know whether Elements allows it (although I assume it must, and other programs too), but in Photoshop's full version, you can even choose just how optimized you want your photos to be. THe program gives you a preview of each level of "optimization" and, as you might expect, the more optimized, the worse the picture quality, but the smaller the file size.
Does this help at all?
Here's a screen cap of the options you have when it's time to save your file. As you know, you click >FILE to get the drop-down menu shown:
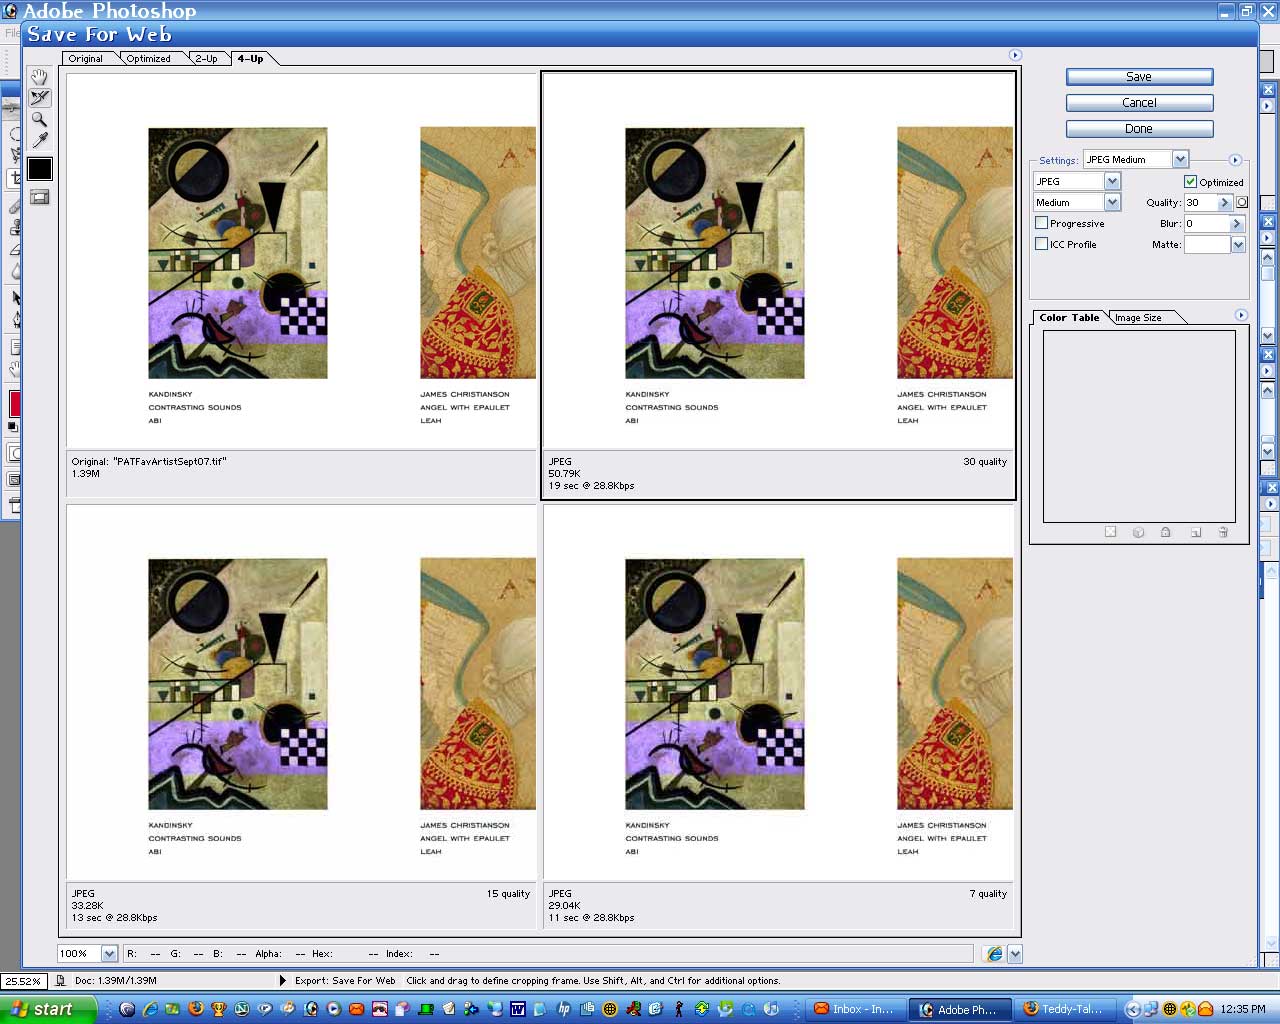
Once you click SAVE FOR WEB, you get to the options screen for that function. In my version, you can view:
-- Your original file at full size
-- A single optimized view
-- Two optimized options
-- Four optimized options
Photoshop calls the last one "4up" in my version. You can then choose WHICH of the four optimized versions you'd like to SAVE FOR WEB. Again, the more optimized the file, the smaller the file size in megabytes, and the poorer the image quality will be. In other words, optimize only so much as you have to, to maintain picture quality.
The overall DIMENSIONS and RESOLUTION of your photo, however -- for example, a .jpeg, sized to 5x7 inches, and 72dpi in resolution -- remain the same. None of those image parameters change when you "optimize" your file; just the file size in bytes changes. I think this means "optimizing" is a way for Photoshop to compress your files and essentially remove some of the information they contain. But don't quote me on that, I'm just guessing.
Here's another screen cap, of the 4up screen that you can choose after you click SAVE FOR WEB.
 Pawssibles
Lots of good info. I just purchased Photoshop Elements and there is so much to learn. Great tutorial for a beginner. This is my first time in tips and techs., and finding loads of info. Actually getting quite addicted to this Teddy Talk Forum.