Banner Sponsors


For artists and collectors sponsored by Intercal...your mohair supplier and Johnna's Mohair Store
 Flying Fur Studios
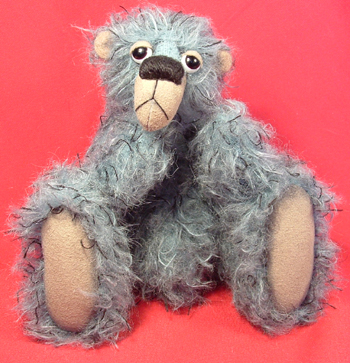 Hey guys, me asking a question again.
I was going to message a few of you privatly about this, but dont' want to put anyone on the spot if they don't want to give their trade secrets away.
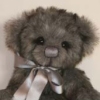
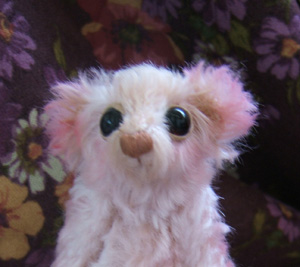
I have decided that on my bears, the eyes are too small, so I've decided to change that and use larger eyes, like I did with my sleep bear.... pictured here..
Problem is, I think the eyes stick out too much.
I sculpted the eyes alot, but only in a small area.
How do you make those large eyes look flush into the bears head??
Do I need to sculpt large circles where the eyes are to go?? Normally I just take in stitches from a small 'dot'. Maybe I should take in stitches in an area as large as the eye???
I'm confused!! 
If anyone can help................................ 

Heather
 Kim-Bee Bears
This is a good question... just curious, are you using round eyes our flat eyes (on the back that is)
Flying Fur StudiosGood question Kim
Mine are pretty flat. The kinds with the wire loop on the back. I can only imagine how difficult it would be to use round ones. OH BOY!!
Heather
 Pandy Potter Bears
Shelli and one or two of the others might be able to help. I have used larger eyes years ago and found when matching them up I had to match the 'domed' part as some were very different. Maybe a different brand might help. Could be worth looking at more needlesculpting. I have to do more for my larger doll eyes (for my bears) to sit straight when I glue them on. Let us know how you go on its always nice to see artists changing their styles. 
When I took the extreme sculpting class from Nancy Tilberg I scuplted almost the size of the eye in 4 spots. They seemed to insert really nice.
Hope that helps.
Jane
Heather I replied to your PM the other day. I didn't notice it there so Im about a month late with the reply!!!
 BEAR ME SHOOTKA
 Heather, I push twice harder and sculpt much bigger space in the eye area. I like to use bigger eyes it gives a special look to a bear. :love:
And I would definatelly add eyelids so eyes would look more natural... 
 Wild Thyme Originals
For some reason, when I glace at this area of the board, the dark squares aren't showing up, so I never know if someone is posting something unless I REALLY look. I don't know if it's just my computer, or what.. anyway, I seem to be missing posts!
I do sculpt quite a large area when using big eyes in mohair. About the size of the eye itself. That does seem to help get the eye more flush to the backing.
Beary truly yours,
Kim Basta
Wild Thyme Originals
Can someone who's answered this thread please describe more specifically what you mean by "sculpting" in the eye area. Do you take stitches in a circle, and pull tight? Or what?
I think many people here might benefit from more explicit instruction on this, as it's been asked about many times over.
Thanks!
I will try to explain myself.
What I was taught is to have four entry/exit points for each eye - you could have more if you prefer but 4 seems to work okay for me. The only way that I can explain it is Top, Left, Right and Bottom - make sense?
Top
.
Left . . Right
.
Bottom
I usually put in a test eye and then mark the points with a pencil just under the outside edge of the eye. These will be my exit and entry points. I enter in an inconspicuous point behind the ear and exit at one of the points I have marked and re-enter a thread or so over and and exit where I entered behind the ear. Pull tight, tie off and bury your threads. Then do the same on the other three points. When you are doing this make sure you do Top and Bottom and then Left and Right or the opposite. This will even out the socket better so that the bear isn't looking outwards or inwards - unless you want that effect.
Hope this makes sense.
Jane
 Winneybears and Friends
I want to screem with delight everytime I see a Plushkin bear ! They are soooo cute !..
OK, the eye thing.... clear instructions Jane, you have to knot and tie off for each spot = 4 for each eye ?
I wonder, can you just make a couple of knots for say the first " top" eye spot ( behind the ear ) then go for the next one " bottom" eye spot and then do the same .... Winney
 Baird'sBears
 Heather,
Shelli posted something on needlesculpting a while back that really helped me a lot. She can say it better, but it involves squeezing the spot you want to sink in really really hard, instead of letting the needle and thread do all the work. This way you're using the needle and thread to secure the stuffing in its compressed form, just where you want it, and you're not manhandling your head so much.
If you can't squeeze hard enough by hand, I'd recommend using C-clamps or spring clamps to compress the stuffing, and sew the compressed spot then. These are the clamps used for woodworking. Of course, on a really ginormous bear you'd have to use bar clamps . . . :whistle:
Eileen
BEAR ME SHOOTKAWhat do I mean by sculpting....well, I'm not sure I can explain it cleary in English bu I'll try
I needle-sculpt on unfinished head with opened neck. here is mine sketch of entering needle in the eye area:
TOP
. .
LEFT RIGHT
. .
BOTTOM
But it may differ if I need specific bear look. If I do sad one (I like sad bears) I stitch
TOP
. .
LEFT RIGHT
. .
BOTTOM
and so on.
I enter needle in the opened neck and exit in the marked points. I always push with fingers cause I had my thread (the strong one) torn when I just pulled the thread. When inserting eyes I push once again harder then it need. The thread will loose a little anyway. Sometimes I ask my hubby to give me a hand to push and I make a final knot.
When both eyes are sculpted I enter needle once again in the neck area and exit in the upper left point of the right eye.
then I push through the stuffing and exit in the upper right point of the left eye. (Did I say that right... Can't think without doing it...) push until satisfied with the results. Then exit in the neck.
Do the same thing with the lower points of both eyes.
I add stuffing to the head after sculpting and close the seams.
About anime bears... I don't do any sculpting and they have that look. Some of my patterns are designed with no sculpting need at all.
One thing I wanted to add it's not about eyes... I found for myself it's better to sculpt face AFTER putting FIMO nose then before. Maybe it's only me? but I really had a couple re-do-accidents with FiMO nose. I had to cut all sculpting stitches and take out all stuffing .... 
 Then restuff and put nose and then sculpt. Now I'm doing it my way from the beggining. :whistle:
Hope this would help  :love:
Huggs, Julia
Flying Fur StudiosThanks guys, THat really does help.
I'm going to try that on my bear tonight. I'll let you know how iw works out.
Heather
 Posts: 16
Hello,
I'm new here. I need info on how to make my eyes on small bears tight. Seem I did the ol' tripple knot then back of the ear then split the thread - pulled the 2 strands through a bit the tied another knot - but it all comes loose.
Help,
Letha
 Donna's Duin Bruins
Letha,
Are you using sinew or upholstery thread? If you use upholstery thread for any sewing, you need to leave around 1/4 inch tail behind the knot or the knot will untie itself. I like to set my eyes the German way which Armella Dana taught me. Put your thread on the loop of the eye and tie a knot close to the loop. Go in the front face of the bear where the eye is down to the back of the neck close to the disc. Take a small stitch about 1/8 back to the hole that you came into at the eye hole on the front of the face. Separate out your threads and pull the eye in tight to where it has a nice deep socket. Then tie at knot on each side of the eye top and bottom. I then tie an overhand knot and sink it behind the eye. By doing it this way you can see that you are setting the eyes at the same depth. I hope this has made sense.
Donna
 Fool's Gold Bears
Surprise!!!
Hello everyone. Some of you don't know me because I've been AWOL for oh, so long. I would like to share what Steve Schutt taught me about inserting eyes. It is similar to how Donna explained. Steve says it's very close to the way Steiff does it, but he likes his way better:
Use artificial sinew. Steve likes to use the thickest kind he can find, for reasons of strength, and does not split the strand.
1.) For each eye, cut a strand of sinew 4 times the thickness of the bear's head, plus some extra.
2.) Thread the strand through the wire loop of the eye and double it so the eye hangs at the folded half of the strand.
3.) Thread the 2 cut ends of the strand into a long, strong needle. Steve believes in always using the largest tool that will do the job, because it is easier on the hands.
4.) Insert the threaded needle into the head from the front, and out the back, along the line of sight that you wish your bear to exhibit, for example, straight through if you want the bear to look straight ahead, lower if you want it to look up, etc. Do not tighten the sinew yet, but insert both eyes and check that the line of sight is equal for both eyes. Remove needle from doubled strand.
5.) Now, at the exit point, separate the double strand of one eye and open it wide to help increase the working hole in the head-back. Pull the eye back out about a half inch or so, and let it hang loose.
6.) Thread one strand onto long needle and insert needle into same exact back-head hole, slanting needle about a half inch above hole and then back to level, so as to take a small "bite" of the stuffing, which will keep the 2 sinew strands from tangling with each other. Exit needle at head-front a few fabric threads above and to the right of the eye entrance hole. remove needle from sinew strand. Repeat procedure with second second strand, taking a small "bite" of stuffing below the back hole and exiting at head-front a few fabric threads above and to the left of the eye entrance hole. You now have two sinew tails extending just to the left and right and slightly above where your eye will be indented.
7.) Tie sinew ends in a double loop, then pull on tails to indent eye, drawing loops up at lower edge, underneath eye, with tails still extending out from under eye. At this point you can tighten or loosen eye, but the sinew will hold in place while you are ensuring that both eyes are even.
8.) Repeat for second eye. When both eyes are indented equally, tie each double tail in a double loop at upper edge of eye and pull to secure. To finish off, tie once again in a square knot at bottom edge of eye. Bury tails by inserting needle under eye and bringing out at top of head; tug on strand, and cut sinew close to fabric.
9.) Use point of needle to move fabric threads back over the hole in the head-back, and move a bit of stuffing under the surface with your needle tip, to camouflage the hole.
All those words make it look more difficult than it really is.
Bear Hugs,
Laure Weltsch/Fool's Gold Bears
Flying Fur StudiosLaure, you are such a doll!! I know who are you! Who could forget those awsome bears of yours!!
The funny thing, I was just revisiting this post minutes ago for some more information. Then here you are, with this wonderufll explaination. Makes sense, I think. I'm gonna give it a go.
Thanks soo much for all the work to explain it.
Heather
 Past Time Bears
Laure, Laure . . . hello! LOVE that you posted - where have you been, Girl? Come back again soon . . . you've been waaaaay missed!