For artists and collectors sponsored by Intercal...your mohair supplier and Johnna's Mohair Store
Hi just been drooling over Paula's beautiful bear Serious Stanley and she got me thinking (which I'm not use to and it did hurt  ). How does centre seams work. Am I right that darts would have to be added to give the nice apple shape that Paula talks about? I have quite a few bought patterns and have looked at alot of books but they all seem to have gussets. I didn't want to pester Paula direct but thought perhaps use an open post so that others can have their input and maybe other newbies could learn something too!
Many thanks Ali x
Just noticed that he is no longer showing up as he sold so quickly - congratulations Paula :clap:
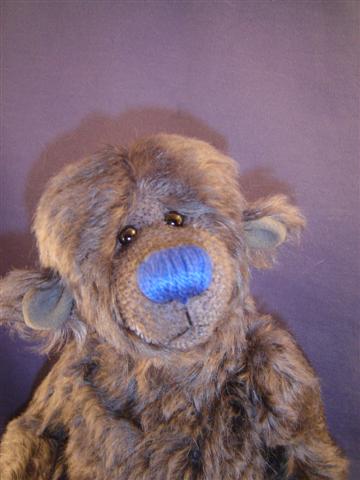
On my bear Freddie - I used a split seam gusset for the head (wanted the hair part effect) and then attached a full nose gusset to that for the rest.
Marion
Marion,
We've privately discussed shaped split gussets. Seeing this idea (and it's a great one!) on S Stanley, I have some questions:
in order for the space to be allowd for cutting the 'dart' and having 2 seam allowances in the forehead/head part, you would have had to spread the gusst template apart. At least this is how I picture your design concept.
When sewing them together, did it create a small 'bubble' in the fabric at the end, in the area between the eyes where the split seam ended? I ask this only because I just had a new pair of shoes treated like this: there was a gussett cut in the front top with some elastic inserted. That 3" section/dart made the shoe too wide around my instep so I had the cobbler (yes, we are lucky to have an actual leather-working Master in the next town!) remove the elastic, insert a bit of leather in place of the elastic and sew those 2 parts together by butting the edges together. Now they are fine' there is just a very small bubble where the old dart has ended but it's small and not unattractive.
So, did you encounter the same problem? Is that what helped create the very small 'bridge' in his forehead just between and above his eyes? I can understand if you don't want to share your trade secrets! We all harbor some of those!
WOW split gussets!!!!!!!!  I must try and look outside the normal box of the basic three peice head - thanks Marion for giving me more ideas to work on. However I'm still curious, I own a miniature bear with a two piece head, but can this be achieved with a larger bear?
Thanks so much Ali x
hmmm - I made this bear last July so will have to depend on my memory.
I don't think I had any bubbling. From what I recall, by the time I finished with the gusset it looked like a normal gusset but with the head part made from 2 pcs and 1 pc for the nose instead on one continuous piece. I wasn't trying for any special shaping - just for the hair part effect. The narrowing bridge between the eyes was achieved by extensive needle-sculpting...and this bear also has a chin gusset, something I often do for a wider muzzle.
2 piece - larger head. I've seen bears like that but haven't tried one myself. Hopefully someone else will jump in here.
Marion
Hi Ali!
I always go for the simplest option when designing my bears ... I like to make my life easy! So my centre seamed bears work with split gussets as Bobby says, but I don't use any darts in the heads (unless I fancy them in the side head pattern). I work with curves instead ... simple but effective! Both sides of the half gusset piece are curved, the degree of curve depends on how I want the finished head to look.
The main problem area when designing this type of gusset is that you may inadvertently shorten the muzzle length, which can create a bulging chin which makes the nose stitching sit awkwardly and so on ... yuk! So this has to be planned into the overall head design, including the side head pattern piece. When making up the gusset it's a good idea to trim the nose end of the gusset seam to a point and flatten the seam open, to limit bulk at the centre point where it joins the chin seam, when stitching the gusset into the head. It also helps to do the same thing with the chin seam. In fact, I nip all my connecting seams to a point for a smooth finish before joining pieces ... particularly useful for the body and heel/toe areas of the legs, as well as the head.
So now you know my darkest secret ... if there's an easy way to do something, I'll find it!!! 
Thank you Marion, Bobbie and Paula for taking time out to answer my query - def a new technique to add to my 'to try' list for the future and now I know Paulas darkest secret ... its alright Paula its only between you, me and a few TTers 
Just had another thought ... the reason behind centre seams! I'm like Marion, I like the 'parting' effect it gives and to achieve that you usually have to lay the pattern sideways on your fabric, rather than top to bottom (assuming you are working with the Selvedge on either side so the weft runs from left to right).
A little history lesson now ... the original centre seam Steiff bears were created to maximise use of the fabric, so only one in seven bears on the production line would have a centre-seam. Needless to say the centre-seam vintage Steiff bears are now very sought after!
However I'm still curious, I own a miniature bear with a two piece head, but can this be achieved with a larger bear?
Thanks so much Ali x
Hi, Ali . . . this is a 10" bear using a two-piece head.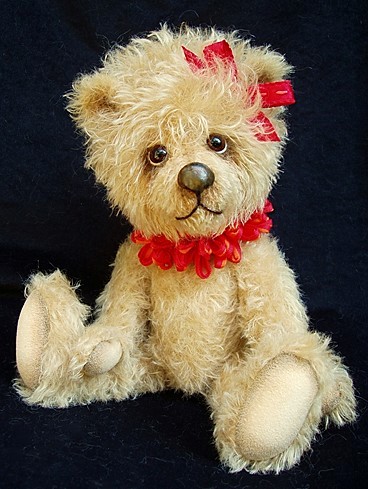
And this is a 12 1/2" bear using the same pattern pieces. 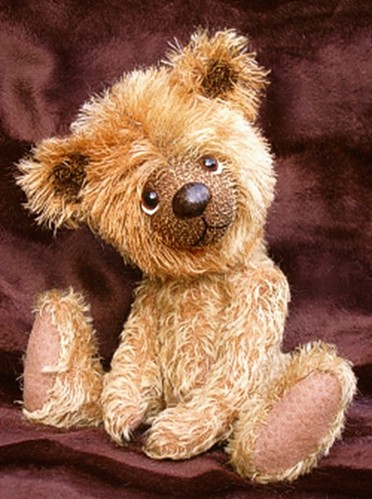
I probably will never go any bigger than this with a two-piece head.
Pauline, my your a treasure trove of info!
Oh SueAnn what a pair of cutie pies and they answer my question beautifully. (drat the icons aren't working just imagine bear with hearts)
Big thank you ladies, Ali x (bear with rose)
I have never had any luck with the centre seam *sigh*
I have tried several times and then tried using a pattern to see how they did it. No matter how I try it, it always turns out flat. i just can't seem to get the darts right.
Sue Ann, that is very curious! The difference between the 2 bears in regards to the head-to-body proportion. Had you not said differently, I'd've sworn that the lighter colored bear was the 12.5" one, because the body looks narrower/thinner. The light -colored one looks in proportion and the rusty colored fellow (sorry - he looks like a boy to me; wouldn't want to hurt her feelings if I'm off...) looks a little under-fed, as his is a sparser mohair. Perhaps a sweater? hmmm???
In going back to the center seam formation, I almost asked you if you used a 3 pc muzzle, Marion. Then I thought you'd've said that if you did, and I can't discern a seamline between/above the eyes at the edge of the pluckedf/shaved area so I went on the premise that it was one piece. Now I can see that if it's 3 pcs, how easily you could create the split gusset/parted hair style.
In regards to our other conversation, is the split center line straight on the grain or curved?
I had a great long reply typed at 1 and lost it all when I went to answer the door.... Ratzz Let me see if I can reconstruct...
uuuummmmm. ... no - the first part has evaporated.
But I did want to comment on the Steiff history. This isn't to lay anything on you, Paula, as I've heard this lore since the late 80s from dozens of sources. Keep in mind that I have worked only in miniatures and in laying out their template pieces, I've squeezed them together so that there are literally threads left after cutting out. And I always left more room for others, not knowing the skill level of the purchaser. I'm going to post a kit pattern.
And I cut out one or a dozen copies of a pattern but laid each of them out as single patterns - all patrs into a single square or rectangle to save on fabric. Therefore, my pattern template is placed so that the left side of a pattern is the mirror image of the right side, with pieces that are cut only once tracking down the center (giving half on each side)
Here's the first one I came across in my bin, not the best example but one can never find those in a hurry - and between cooking dinner...)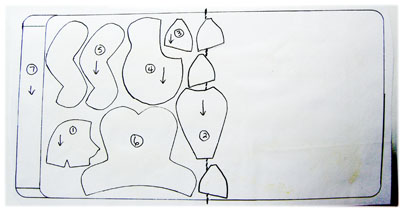
Sewers would trace the pattern templates from the drawings on the left side and lay them out in a mirror image fashion on the fabric for which I sent out exactly the right size. As a kit developer, one must always always watch The Bottom Line and not just whack off a quarter yard of fabric for a 3" design!
I don't think that it's ever been said if Steiff or other manufacturers would cut out 10 or 100 bears at a time: 200 limb pieces (100 of inner & 100 of outer pcs) 200 body halves, 200 reversing side heads and then find that they could get the only one single pattern piece - the gusset - out in one piece in 6 out of every 7 cuttings.
This didn't make sense to me, given that they don't divulge their layout techniques.
When we toured both the Steiff and the Green Hermann factories, we were able to freely wander through the room(s) watching as the band saw cutters cut out layers of fabric (but only as individual pieces, which had already been separated from the layered bolts) - there was fabric around each of these parts - MUCH more than most of us would waste!!
And watch the nose stitchers (not all that great, workng very quickly with a honking big needle and a single length of worsted wt yarn) and the excelsior stuffers. I've already told else where about not realizing that one of the 3 stuffing men is blind, until he came out of the factory at quitting time and joined a lady walking out, by resting one hand on her shoulder.
And seeing their fiberboard pattern template pieces (since the company's beginnings) hung each on a huge nail all around the rooms, with a hole drilled through the center of every piece used in that bear design. It felt almost hallowed to see this offhand yet efficient way they are stored!
So if they laid out all of the inner limbs and then one of the body halves into that inner curved section, then 100 more other body parts and 110 more of another, etc... 'perhaps' I could see how they 'might' conceivably run out of room for a full width gusset for every 7th or so bear, but I've privately thought it to be a 'Factoid':
From the Amer Heritage Dictionary:
something fictitious or unsubstantiated that is presented as fact, devised esp. to gain publicity and general acceptance because of constant repetition.
Call me a skeptic but I have always thought it to be just a pattern design of one or more bears in their line.
And they did nothing clever with it, as you did Marion & Paula, in using that split to direct the nap in an un-standard direction.
Supper's ready. Be back when the dishes are done!
Sue Ann, that is very curious! The difference between the 2 bears in regards to the head-to-body proportion. Had you not said differently, I'd've sworn that the lighter colored bear was the 12.5" one, because the body looks narrower/thinner. The light -colored one looks in proportion and the rusty colored fellow (sorry - he looks like a boy to me; wouldn't want to hurt her feelings if I'm off...) looks a little under-fed, as his is a sparser mohair. Perhaps a sweater? hmmm???
Hiya, Bobbie. You are correct that Beezley (rust colored bear) is a boy AND he is actually 10", also. I got him mixed up with another bear that IS 12 1/2". I use this pattern as an anime design. (Sorry if I offend anyone when I use "anime" instead of "chibi" . . . I'm just used to the word and I think all of you know what I mean.)
Anyway, this is actually the 12 1/2" bear, Dumplin'.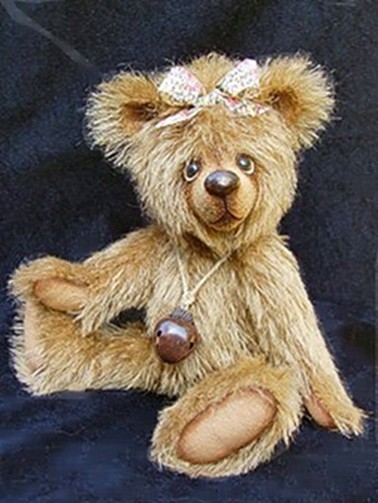
Bobbie, I think they only did the center seams during the war to conserve mohair because it was in such short supply since they used it to line jackets and airplane seats and stuff. In those days they laid the patterns out a little differently so as to use every scrap. That's why they don't have center seam bears now unless they are a reproduction.
Ditto what Kelly said historically speaking ... also, I read somewhere too that the heads were laid out on a piece of fabric and every seventh head had a centre seam to fit the fabric ...
Whatever the method, the end result was gorgeous! Those early Steiff bears were soooooo much better than the modern equivalent.