Banner Sponsors


For artists and collectors sponsored by Intercal...your mohair supplier and Johnna's Mohair Store
All this talk about mini fabrics lately has me rethinking minimaking. I started one, once, that would have been about 5 inches tall. Drove me nuts, it did. I swear it. But the fabrics are so cute... :)
Someone give me a short version run down of how to make a mini. Assume I've got a pattern already. Then what?
What I'm looking for is information about process. Such as:
1. Trace pattern onto fabric.
2. Fray check before cutting
3. etc...
or
1. Trace pattern onto fabric.
2. Double fabric and sew limbs together BEFORE cutting.
3. Fray check
4. Cut
... and so on.
Also, some helpful pointers on turning itsy bitsy pieces, especially the REALLY itsy, bitsy pieces (like ears), would be helpful.
Last, can someone discuss eyes for minis? For makers of big bears like me, these issues are absolute trenches of the unknown.
Thanks in advance!
 Kim-Bee Bears
Ok here is my imput - the other kim could probably give you more pointers..
1) Trace pattern onto mohair
2) fraycheck and let dry
3) cut
4) sew
5) turn body parts right way out
6) stuff head
7) needle sculpt head and attach to body
8) sew on nose or embroider nose
9) add ears
10) attach legs and stuff
11) stuff body
12) sew up
13) add eyes
14) decorate, shading, finishing touches
I find it easiest to turn with a hemostats but make sure you grab a chunk of mohair and the backing and not just the mohair or you will tear the fuzzies off! I also use tweezers to turn.
Kim-Bee BearsOh missed part of your question - I have hematite beads, onyx beads and some teeny tiny clear glass wired eyes also. Depends on the bear which will use...
I guess the best thing I can tell you is having patience and tiny hands helps also! 
Great so far; thanks Kim!
Also... more questions.
A.) What size disk joints for what size mini? I'm working with 1.5" and 2" disks right now for bears ranging from 9" - 20". How small do I need to go to get down to 5-8"?
B.) Alligator clips, pins, or fingers, to hold pieces together while sewing?
C.) Do you sew AT ALL using the machine, or is it all by hand?
D.) If by hand, is it always backstitch? How big is each backstitch?
E.) How large is your seam allowance?
Please feel free to copy and paste the questions so that you don't miss a single chance to answer! 
Do you HAVE TO USE cotterpins, in this size?
Aren't I a pest?
Kim-Bee BearsA.) What size disk joints for what size mini? I'm working with 1.5" and 2" disks right now for bears ranging from 9" - 20". How small do I need to go to get down to 5-8"?
Not sure of size, I have a lot of washers but not sure-whatever looks right LOL
B.) Alligator clips, pins, or fingers, to hold pieces together while sewing?
I use fingers to hold pieces since the pieces are tiny but my smaller bears are only about 2-3"
C.) Do you sew AT ALL using the machine, or is it all by hand?
ALL by hand
D.) If by hand, is it always backstitch? How big is each backstitch?
teeny tiny stitches close together - the smaller the bear the smaller the stitches LOL
E.) How large is your seam allowance?
I would say my seam allowance is about 1/8" at most...
Kim-Bee BearsI also use teeny tiny cotter pins - gosh, wish I knew what size they are so I can tell you...
You arent a pest... it is your turn to pest me instead of the reverse LOL 
 Bumpkin Bears
 Great minds think alike Shelli - I've been thinking about making a more mini bear again. I tried one last year which went well but like you say BOYYY does it take a lot of patience, I found turning the pieces inside out the hardest and even ripped the seams once trying to turn with tweazers :doh: I think I made life hard with a more fluffy fur. You can see the little chap "Tommy" in the photo.
Waiting to hear everyones tips :)
Hugs
Catherine
 Apple Dumpling Designs
Hey, I do everything the same way I do on a bigger bear only in a much scaled down version.
The tiny tiny bear that I just did...the orange blob...I thread jointed him rather than using cotterpins. Since I've yet to try the whole nut and bolt technique yet I have no advice.
A.) What size disk joints for what size mini? I'm working with 1.5" and 2" disks right now for bears ranging from 9" - 20". How small do I need to go to get down to 5-8"?
I don't use the hardboard disks but just the washer...I purchased item W-2 from Edinburgh...and the mini-cotterpins also from Edinburgh. But I think it depends on how big your shoulder and hip size are.
B.) Alligator clips, pins, or fingers, to hold pieces together while sewing?
I use my tiny tiny applique pins...it only take one or two maybe.
C.) Do you sew AT ALL using the machine, or is it all by hand?
All by hand...
D.) If by hand, is it always backstitch? How big is each
backstitch?
Backstitch...as small as I can...I also use an applique needle which has a very small eye. Do you really want me to measure my stitches
E.) How large is your seam allowance?
Nancy Tillberg talks about that in her book...101 Bears...page 161 is the start. General guidelines...5-6" use 1/8 seam allowance...4" or smaller 1/16" seam allowance. Seems to work for me.
I hope that helped!!!
P.S. For turning AND stuffing, I use my fancy schmancy chopsticks which my ex brought back from Asia...they work great...and since I never could get the hang of eating with them...
 Pandy Potter Bears
I got some great forceps off ebay to do my turning of limbs. Came with a good pair of tweezers to. I use 3mm black eyes and for realism fairy doll eyes to. I don't do less than 4" now although I did smaller years ago. I use small cotter pin joints about 1/4" and I sometimes use the cotter pins and bigger washers. You will need small steel shot and I got a smaller curved needle from Tesco. It was just over an inch wide and really helps to sew ears on. I think you will really enjoy the challenge and it could open up a whole new market of collectors.
www.fairytasia.co.uk for fairy eyes, lovely site too.
Custard my avatar is 4" and I half sewed him on the machine and then did the fiddly bits by hand.
 MerBear Originals
<img src="http://i19.photobucket.com/albums/b180/merbeary/3bears.jpg" alt="Image hosted by Photobucket.com">
I mostly make my minis from vintage rayon that I order from Sassy Fabrics
www.sassybearsandfabrics.com. You don't have to fray check these. I use a small quilting needle and regular sewing thread - very very small backstitch. You can also get the small disks and cotter pins from Sassy although for the really small bears you can thread joint them.
I use a combination of bamboo skewer and forceps to turn them.
Be very careful - I refused to make minis for years - thought it would be too picky - and then a friend had me try a 3" pattern. It turned out to be instantly addictive. Now whenever I'm bored I quickly cut out a mini for fun.
Have fun,
Marion
Kim-Bee BearsOH!!! Shelli forgot to tell you, I get my mini washers from the hobby shop, ya know, where they sell remote control cars and airplanes - mini cotter pins I get from Home Depot.
MerBear Originals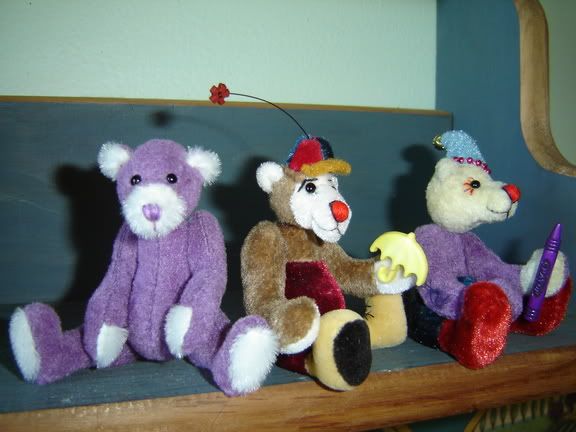
here is a pic of some of my minis.
Marion
Awesome stuff, gals; keep it coming.
Kim, how big are those washers? Is it good to use washers (which are so thin) instead of disks (much thicker) for the tiny ones?
Kim-Bee BearsI guess it depends on the size. My tiny ones (2-3") I just use the tiny washers and cotter pins - Gals - any other suggestions?
Okay - Shelli I have only made one mini bear, so bear with me! :D
A.) What size disk joints for what size mini? I'm working with 1.5" and 2" disks right now for bears ranging from 9" - 20". How small do I need to go to get down to 5-8"? I used a disk that was 3/8" in fiberboard or a washer will work as well.
B.) Alligator clips, pins, or fingers, to hold pieces together while sewing? fingers and a pin or paper clip to keep it from slipping
C.) Do you sew AT ALL using the machine, or is it all by hand? all by hand, but body may be large enough to do with machine.
D.) If by hand, is it always backstitch? How big is each backstitch? Back stitch, I counted them... 14-16 per inch :)
E.) How large is your seam allowance? 1/8 " my bear was 3"
I never finished my bear. He's jointed but I didn't attach the ears or sew the nose. I did get glass wired eyes in size 5mm for him though.
Apple Dumpling DesignsThe washers I bought are 3/8" x 1/8" (9mm)...it looks like they have some that are 7.5mm also. I guess it really depends on your joint size how small you want to go. I also read somewhere and I can't remember where that you can use small bead between the body and the arms or legs when doing thread joints...but maybe I dreamt that. :doh:
Eyes...I didn't like the beads as well...but that was me so I ordered some from Intercal...they are 4 mm...but again that's all individual preference.
 Flying Fur Studios
Shelli,
I think everyone has some great advice. I agree with Marion that sassy bears has the mini disks and cotter pins, and I would consult her as well. She'll help you. But if you're like me, I just got some of all her sizes!!
You'll really like mini making. Sure, you can sew them on the machine if you like. I use 1/8" seam allowance. But they are also great to sew by hand. You can take them anywhere to work on. Keep one in your purse etc.
I don't have fancy tools, but I've done really small bears with a chop stick to turn the pieces, even the ears. You just use the chopstick like you were putting on a condom. :redface: :redface:
I don't bother to baste, or use clips when I'm making a small bear 5" or under. I find it's very easy for me to hold it where I need it.
So, you can sew it by hand if you're taking it out of the house with very small backstiches, with a very small needle. Or you can sew by machine just as you would a large bear, or like you asked, buy doubling the fabric, sewing and then cutting. That's a good trick for tiny bears 3" or under. Just dont forget to leave stuffing holes!! :D
Or you can buy a kit off ebay, and do it that way.
Just try it, you're going to amaze us all by your super cute mini's. I just know it.
Heather
 Starlite Bears
Hi Shelli and everyone,
I thought since I make quite a few mini - miniatures I would contribute :rolleyes:
Preparation:
Assemble tools/materials:
Fabric, Paw pad material (options if you are cutting >1 bear at a time)
Fray Stop
Needles
Awl
Tweezers - Needle nose
Pliers - Needle nose
Matching Threads
Small scissors eg embroidery scissors
Freezer food bag to keep bear parts in
Set of joints ( eg 6" bear = 10mm joints, 3" bear 6mm or 7mm joints)
True Eyes set 2- 5mm
a) Match fabric to size of bear I want to make
b) Place pattern on fabric considering best use of available fabric
c) Draw around pattern changing seam allowance according to fabric pile ( ie smaller for short pile maybe 1/8th inch , larger for long pile or plush)
d) Match paw pad matrial to fabric and outline paw pads
e) Using very small embroidery scissors cut around pattern in bear fabric and paw pads material
f) Assemble all pieces to check I have every body part included
g) Fray check (I use impex fray stop - this is white glutenous sticky and dries clear resin finish) all bear parts
h) Dependant of fabric eg long pile/plush - trim all seam allowances back to backing material
i) Check body parts equal eg match right leg against left leg for correct sizing - trim and fray check again where necessary
j) Holding in hand Sew parts in the following order using a small size 10 or 12 needle and very tiny backstitch :
Head first including gusset where required - starting with the seam at the nose - sew left side from front of nose to neck, sew right side from neck to front of nose
Arms ensuring that a suitable gap is left to insert joint and stuffing
Legs
Body
Ears
k) Once all bear parts sewn use heomostats to turn (for tiny tiny bears I have used a matchstick before)
l) Check seams to ensure no pile caught in seams if any caught use needle to free
m) Use Awl to make appropriate hole for insertion of joint in each limb
insert joints in all limbs
n) Stuff with kapok/ polyester using either heomostats or tweezers
0) Order of stuffing is - head, leg, arm, leg, arm - finish closing seam in each in turn
p) Attach ears to head using running stitch and pulling close to stuffed head
q) True eyes to choose eye position
r) Needle sculpt eyes socket
s) Use awl to create hole for eye - attach thread to eye and secure ( flatten wire loop if using looped glass eyes)
t) Using long doll needle or similar insert each eye in newly made hole for each drawing through to chosen position (eg base of head or back of ears).
u) Secure eyes and sink thread in head
v) trim nose area
w) Outline nose shape with pearl waxed cotton
x) fill nose and create mouth
y) Joint head to body using needle nose pliers for turning of cotter pin, joint arms, then legs
z) Add tush tag, complete stuffing body including little pillow of weighting eg steel shot/glass beads(prepared earlier), finish nose
Oh boy do I go on - isn't it just as well the alphabet only has 26 letters 
Thats what happens when I decide to contribute - sorry if anyone reading is now yawning and off mini/miniature making now - it is great fun and I sit for hours in front of television doing it!!
Sorry for boring :redface: but since I typed it now I will post
Hugs Anne
 NSW Australia

 Hi Shelli,
depends on what you actually call a mini. I never make a miniature mohair bear under 3 inches. The mohair gets too difficult to work with, plus the mohair looks too spikey for my taste
I normally string joint the limbs of bears that are 3 inches and under, but I always use cotter pin and disks for head & neck joints (except for my 1 inch mini's). On just say 4 to 5 inch bears , I use cotterpins & disks for joints as well.
A mini bear fabric like an upholstery velvet is easier to work with than mohair on a small bear. I found it easier to turn. It is a bit harder to get a nice expression for the face. You need to possibly do a bit of needle sculpting.
You can get small glass eyes, or another option is onyx beads. They range in size from about 1 mm up to something like 5 or 6 mm.
You can buy tools like small cotterpin turners, small heamostats for turning, small plyers etc
I read in one of the miniatures books from way back, the defination of a miniature bear bear is. Miniatures are based on a
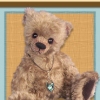
1/12th doll scale. In short if your full size teddy is 2 ft tall, your corresponding miniature should be 2 inches tall. So, from that I basically slowly shrank my larger patterns till I managed to get them down to miniature size. It was a bit daunting at first , because I started off with 12 to 16inch bears. From there I got down to 8 inches, 7 inches , 6 etc till I managed to create my first 3 inch mini. Going down in size gradually made if far easier, than trying to jump from a 16 inch bear straight down to a 4 inch bear even though process of creating the bear is the same. You've just got to think small.
Misty ( my avatar is a 3 inch mini mohair with an inset muzzle)
Candy is a 2 inch meduim pile uv bear.
Mindi is a 3 inch mohair with a 1 3/4 inch uv baby.
Treacle is a 5 inch mohair with a 2 1/2 vintage longpile uv baby.
Apple Dumpling DesignsRikki...your little bears are adorable. Someone...and again I can't remember...said that you have to reduce the head a bit more when reducing your patterns because the head looks too big...did you find that to be true? I'm having a hard time with that concept of proportion...mathematically speaking.
Your first posting is very helpful...even for me who just dove in...I'm a bit dangerous that way...dive in...ask questions later... HA
Shantell
Wow, you girls are superstars! There's so much to consult here, I think I may have to print everything out. Thanks to all of you, especially those of you who took the time to really record step by step what you do.
I have one last question to ask... perhaps the most important question of all...
Do you need to have long fingernails to make mini bears? This seems like a joke question, but I'm dead serious. I'm an ex-nail-biter who prefers to keep her fingernails as short as possible (and pedicure the toenails to the max instead!) I'm truly curious if long fingernails help, or hinder, the mini making process.
Thanks again!
Apple Dumpling DesignsHaving had both long and short nails...I can't imagine trying to work with the little pieces of fabric with long nails.
 Terries Bears
 Shelli, Iam sure that you will enjoy the challenges of making minis. Here is how I do them:
- A bear over 3" I backstitch but anything under 3" I find that it is easier to do the quilting stitch that you use for topstitching, poke the needle straight through the fabric and then straight up from underneath. I stitch them twice so that there are no gaps around the curves. Rather than knot and tie off the thread when I sew the body, I leave a long thread so that there is a little extra room to open the back while I turn the cotter pins. After the joints are done it is easy to pull the thread and sew the body closed.
- I cut out all of the pieces just the same way that you would for a larger bear.
- I hold the pieces together when I sew them but on bears less than 3", I use hemostates for almost everything....turning pieces, holding and inserting cotter pins & washers, and stuffing.
- I use 3/4" cotter pins in the arms & legs and 1 1/4" for the head. I buy washers in sizes 2mm, 4mm, 6mm, 8mm & 10mm and just use what seems to be the right size. I buy cotter pins & washers from a nut & bolt supply store and they all come in boxes of 100.
- I am a reformed nail biter also, but I think that they would be easier to handle with short nails.
- I have just finished working on two little bears, Lavender 2 1/2" and her little sister Lace 2 1/4".