Banner Sponsors


For artists and collectors sponsored by Intercal...your mohair supplier and Johnna's Mohair Store
 Upstate New York
I use string, but will have to check out the flex ruler. Thanks for the link.
Upstate New YorkI looked at the course descriptions at www.kranbearys.com. Are they self-directed with regard to timing? Or do you have to keep on schedule?
 Flying Fur Studios
3. If you are making a 2 piece body, add darts at the bottom to give fullness. Remember you can add more than one dart, I use three small darts.
6. JUST HAVE FUN! How's that saying go... "Don't sweat the petty things and don't pet the sweaty things"
I never thought of using more than one dart in one place. So if you use 3 small darts, does that mean, 3 small ones side by side?? Or up and down??
Now I wish i wasn't at work so I can try it!!
Flying Fur StudiosDeb, I am taking that course now and it's self directed but the course does only stay open for soo long. A couple of months maybe?? But I'm sure you could always print it out. But it's nice to do it while it's open, because then you get a good chance to ask the instructor questions etc. Well worth it, and I'm VERY slow to finish it.
Upstate New YorkThanks Heather. That's my worry ... being able to commit to getting done in set timeframe.
 Posts: 3,177
I always use graph paper for drawing patterns - easier to match curves when drawing.
I don't use a flexi wotchamacallit for foot pads, i sew the leg, measure the length of the foot opening from heel to toe, mark this on graph paper then only draw one side of the footpad. Add seam allowance then fold the paper in half then cut out around the shape that i've drawn. Et Voila! A footpad :P
P.S. if you have a skinny top of foot you'll need a skinny footpad as there won't be enough fabric to accomodate a wide pad and you'll end up with a 'puffy' paw pad. :rolleyes:
No need to keep altering pattern pieces for the head - just sew a wider seam allowance when stitching the top of the muzzle of the bear and you'll end up with a thinner nose.
To make a head rounder on top just add 2 darts on the top then reduce the head gusset OR don't reduce the head gusset just hack the excess fabric off when you've sewn the head
If you want to change anything on a pattern just try hand sewing - you can alter the shape by completely ignoring the shape of the pattern and stitching to the shape you want. It's a bit like freefalling - try it on an odd bit of mohair, cut an arm or leg and see what you come up with. If you like the results cut the mohair where you've stitched and draw around it to produce a paper pattern
You can see that i have a hands on approach girls - all mohair mistakes can be shredded and used as stuffing so no waste - go with the flow - no pain no gain as they say.
Penny 
 Back Road Bears
6. JUST HAVE FUN! How's that saying go... "Don't sweat the petty things and don't pet the sweaty things"
LMAO! I've never heard that! Thanks for the laugh!
Penny, You are such a refreshing inspiration! So many of us are apt to feel we've got to follow the 'rules'!!! Thanks for reminding me that there are NO RULES in bear making!!!!
Posts: 3,177You're welcome Daphne - i HATE rules :P
I hand sew for pleasure and that's how i learnt how to sew bears and get them to look how i want them to. If you usually use a machine then i recommend playing around with a bit of hand sewing - you learn a lot of worthwhile lessons and the stitches are easier to unpick and start again!!!!
Try cutting out a bit of old fabric and pinning it together into the rough shape you want, softly stuff with cotton wool then put a few tacking stitches in to form contours. Believe me, this is a real eye opener, as you get to learn how a 3 dimensional design works. It helps you develop the 'eye' for cutting pattern pieces - this is not my wisdom it's my Mums.
My Mum was a superb needlewoman, she could upholster a sofa, draw and cut patterns and would make the most beautiful clothes. I am still jealous that she could hand sew a tailored COAT - complete with lining and handsewn buttonholes.
Still. must'nt grumble. She used to make me toys too :P
Penny - hand sewing fanatic
 Jare Hares & Bears
Jare Hares & Bears wrote:3. If you are making a 2 piece body, add darts at the bottom to give fullness. Remember you can add more than one dart, I use three small darts.
6. JUST HAVE FUN! How's that saying go... "Don't sweat the petty things and don't pet the sweaty things"
I never thought of using more than one dart in one place. So if you use 3 small darts, does that mean, 3 small ones side by side?? Or up and down??
Now I wish i wasn't at work so I can try it!!
I space the darts about an inch apart.
I fold the body piece in half and make one in the middle, then add one in front and one in back. They can also be shallower than a single dart.
 Luxembears
Jared...this is hilarious!!!
"Don't sweat the petty things and don't pet the sweaty things"
I am going to remember this one! 
You can see that i have a hands on approach girls - all mohair mistakes can be shredded and used as stuffing so no waste - go with the flow - no pain no gain as they say
Penny, I'm with you girlie! I follow my heart and fly by the seat of my pants. This keeps things interesting and fresh and much less of a headache!
I think the only RULE in art is that is should come from within YOU...period.
Posts: 2Hi, Shantell:
I've learned how to design my patterns from the artist books available, and as my confidence grew, I can achieve athe design I want. But sometimes even after all the work I will go on to another. I draw in my book, and will use the pieces or incorporate another. Fabric can change a design for me. If I'm at a show and think one of my bears just isn't right and I'm thinking of changing something, they sell. you just can't explain it. thumbsup:
I don't have any miracles to disclose I'm afraid - I'm just a pencil, card and eraser kinda gal! I sketch the pieces freehand, rub out a lot with the eraser until I get the shapes I want and then cut out my pattern in thin card. Before I commit it to fabric, I lay all the pieces on top of each other to get an idea of whether or not the proportions are working and then off I go with my fabric scissors and set to work snipping out the pieces!
Fabric choice is hugely important in determining the final design outcome. Once you've made your choice, the main trick is to visualise shapes first - for example, do you want him to have straight legs, or do you prefer a nice drumstick thigh, with a narrower ankle? Would you like your bear to have traditionally straight arms, or would you prefer to bring him bang up to-date with a more shapely curve to his arm; is he going to be a straight backed chap, or a humped hunk? If he's humped, how humped do you want him to be? Will his belly be slim, or full of honey pudding? Do you want his muzzle to be pronounced to give a dramatic expression, or do you prefer cute, in which case maybe a shorter snout would give the result you like? Will he have masculine, squared shoulders, or would you like 'he' to be a 'she' with a slender shoulder? Will he have huge feet, dainty feet ... and on it goes.
When you've got to grips with the shape of bear you are aiming for and have made the limbs, head and body sack, you need to consider how you would like your bear to come to life. For example, will he slouch or will he sit proudly upright? Think about which stuffing materials will work best for your design. Consider the limb placement carefully ... positioning joints in different spots will give different results and produce different characteristics. Will the head flop, wobble or sit firmly on the body? The possibilities are endless!
Then of course there's the design of the head. Once you've established the shape of head you want, so much of the design's character hinges on different colours and sizes for eyes, nose shapes and colours, needlesculpting, scissor sculpting, ear shape, size and position ... all of which combine to bring your bear to life and to make him unique to you.
Needless to say, there are many variations on the teddy bear theme. For example, I prefer to use four piece bodies, two piece arms and two piece legs in the main - I find them most versatile, but many other designers like two piece bodies, one piece arms and one piece legs. Then there are those who enjoy working with additional neck pieces for added poseability ... so much choice!
Once your bear is assembled the fun part of the design begins - how to dress, trim, accessorise, detail the finish; all these elements combine to make a unique bear.
My tiny tip to get the paw pads stitched in perfectly, is to draw my seam allowance onto the reverse side of the paw fabric - I do this with my open mouth inserts too, then I pin, baste and machine sew. It takes time, but it's worth it.
Much of the design process comes from what's gone before ... by that I mean everytime I make a bear, I see a way to improve on it or develop it further with a new technique. So I guess the more you make, the easier it gets! Or does it? The most exciting part of bear design for me, is learning new things and of course, that takes time and commitment.
Making teddy bears is something everyone who can sew can achieve, but truly designing unique bears takes so much more effort. It takes vision, creativity and a passion to keep learning.
 Kim-Bee Bears
I am a pencil and eraser gal too.... I sketch and erase and sketch and erase.... I use graph paper so I can count blocks to make sure my pieces are the right size proportion to one another.... I also have a bendable ruler and lots and lots of french curves.... I draw two piece arms, two piece legs, three piece head and two piece bodies... I RARELY will do a three piece arm with paw pads.... I am somewhat confused when it comes to four piece bodies... I did a four piece body for my T4Charity bear but I still don't know how to design one LMAO... I just cant figure out how to draw it or how the pieces come together... I feel like a dodo..... Other than that all my bears have the same number of "parts"
I would also like to try to design an anime bear - I see that as being something I will do soon  I really like the anime bears that have the wide oval heads so that might be worth a try or, I was thinking of doing a triangular head and see what comes of that LOL... SOOO many possibilities...
 Newcastle, Ontario
Hi there.
Just reading over some categories and saw this one. It's interesting to read how everyone goes about making patterns.
Helena and Stephanie, I'm with you guys. I can go from 2D to 3D and back again, in my head. My entire family is very creative and I was also lucky that my mum taught me "everything" about sewing at a very young age, including how to draw patterns. Girls, I think our "specialty" is that we have extremely accurate visual perception - I think even as high as 95%. I once did an exercise in a book called Drawing on the Right Side of the Brain. There was a picture of Van Gogh (I believe) and they asked you to draw it upside down. Most people will do much better, for some reason, with it upside down. It didn't make any difference for me - I could draw it the same, either way. I drew children's portraits for quite a few years, but also sculpted miniature dolls so I seem to be able to translate either way.
I draw all my patterns freehand. I draw a complete picture of what I want and then break it down into parts. I cut straight to mohair, and there has only been once or twice that I goofed, usually on the head. I'm lazy, and I always cut my footpads by visual gage, and if it's too big, I adapt it as I go, but I'm usually fairly accurate. My downfall are my noses - don't like doing them and I know it's my "weakest link".
Hugs,
Brenda
Posts: 139I'm loving this thread! It's been very helpful. Thank you muchly!
Informed hugs,
Lyn
 Just Us Bears
Well I for one hate the flexi ruler...I find mine too big and chunky and not at all accurate. Maybe it's just the brand I have, but I find it isn't flexible and accurate enough for head gussetts or footpads....and you can't achieve an accurate right angle with one.
I use a pipe cleaner (chenille stick) or thin craft wire for measuring and shaping out the curvy parts like gussets and footpads and it works great.
Another thing I do to get the curve right and the top of the arm or leg is draw around my disk, then add 1/2 an inch. This gives 1/4 inch space around the disk and up to 1/4 inch seam allowance.
Kim, I think I may have a go at a clay model...I would love to get a different shaped head than what I do sometimes...something with a more unusual muzzle shape like Judi's inset muzzle bears, but can't get my head around the hows and wherefors. So the model may do it for me....not that I hold much hope of being able to creat a clay model that looks like I'm picturing!!!
Great topic Shantell!
 Canna Bear Paint
My experience with a Flexi Ruler was similar to Hayley's, I couldn't stand the thing and found it entirely inadequate for the areas that required the most precision. I just use a simple vinyl flexible measuring tape, like the kind that quilters use. I can bend it in any shape whatsoever, measure anything and just make a quick mark on the paper where my measurement ends, and keep movin' on.
I also freehand sketch out the picture of the final product that I want. Then I cruelly take scissors to it and lop off the head where it joins the body, cut out the legs where I want them, and start making the pattern pieces from the lopped off parts. Cruel, but effective!
My mother gave me a tip before I got better at measuring out precise foot pads. She suggested measuring the length of the bottom of the leg piece (you know, where you'll sew the foot pad onto). Make on oval with 2/3 the length of the amount you just measured. She had me fold a piece of paper over in two, mark the start and stop of the 2/3 length on the paper, then just cut half an oval shape from the start to the stop line. When you unfold the paper you have a symmetrical oval foot. And remarkably enough, it really did work fairly accurately.
Hope this helps!
Kelly
 Debonaire Bears
What a great discussion! I am very impressed with you ladies who can just sketch out a pattern, gussets and all! My designing involves a lot of trial and error.
When I have a new idea, I draw out my pieces on card stock, cut out, and sew it up using an old sheet. Then when I have all the parts stuffed and pinned together I can easily see what needs to be adjusted. I just keep tweeking, and making new pattern pieces, then making new old-sheet body parts, and throwing away the old ones, until I get it just right.
 Posts: 177
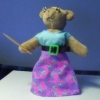
Love this. The only thing I have done is add breast to one 4 1/2" teacher bear I made, for my daughter. She loved it. This is the bear I use as my Picture here. Thank for sharing. Now I got to get the courage to do it on my own. LOL
 cherylsbears
Hi Everyone, I need to design a pattern for an English Bulldog....is it impossible? Teddy bears seem easy most anymore, but then this is out of my comfort zone. A friend wants me to do one for her husband...HELP!!!!! :redface:
I'm an alien, too! When I first learned to make bears, my "teacher" was an engineer prior to being a bear maker so he was quite adamant about measuring everything, I hated that! I usually don't even draw, I just pick up the scissors and start cutting my pattern from paper. To fit the gusset, I bend the paper along the side of the head piece and then add about a 1/4" that I can cut off of the fabric later ;O) I'm sure those who do things the "proper" way would shudder to see the way I do it!
Hugs,
Janice
GJOYful BearsWow what an interesting post. I have done some sketch and art courses etc, I always begin with a sketch of the finished product with all the accessories in the sketch I want to use - then I draw out shapes using graph paper and then I perfect angles etc before transferring the pattern to fur - or, if it's going to be a pattern I use a lot I transfer it to plastic and then to fur.
As for the English Bulldog - I think if you just use a basic dog-shaped pattern and then just needle-sculpt the creases for the face etc. But sheesh! Out of all the dogs they could possibly think to ask you to make it had to be one with more wrinkles than a pug lol. Good luck to you!
By the way I think a pattern that had a wire armature would probably work better for realism etc then a pattern with seperate limbs that were jointed. If that doesn't make sense feel free to let me know lol. Sometimes these things only make sense to me lol.
World Of MineI know this post hasnt been visited in a while but i thought id share my way of designing patterns, as it seems rather different to everyone elses here!
Typically, i get pictures of the parts im looking for, even though i crochet, the theory works for sewn bears. If im looking for an arm ill look at as many pictures of arms as i can then get the picture in my head of the shape and legnth in relation to the rest of the picture in my head. Perhaps i have that talent for going from 2D to 3D and back again that others here have.
Once its pictured in my head with all the parts accounted for ill often sketch out the picture to scale. Then as you would when sewing bears i look at the shapes im trying to achieve and mentally measure (or count stitches in my case) the seperate parts. Darts for me are decreases and increases and different shapes require some thought since i like to work in single crochet as much as possible... I use a cheaper fiber to test out a new shape then just plow into making the parts. Most often they work how i pictured them, if they dont i bin it. I like to learn as i go and learn from my mistakes. If a critter doesnt look right when im finished it goes to the kids, if it comes out how my brain says it should it goes on the shelf.
So im a visual kinda person, and i tend to plow into the design... Then have to go back and count and measure the part once its made so that i can do it again for the other side  I do make paper patterns for clothing i make though. And again, i use the same process of visualising the piece, shetching, then ill measure and sketch onto baking paper, which is see through and doesnt tear as easily The other option is to use cheap interfacing to make the pattern pieces, the bonus with that is that is tends to cling to the fabric rather than sliding all over the place like paper or plastic. As i make mini things most, i actually laminate the pieces of interfacing without the seam allowance added, then cut around them where the seam allowance goes, instant, long lasting pattern pieces! If i need to mark places under the laminated pieces i just use a craft knife and poke holes where the marks go then poke my pencil through...
So im an odd one, but more than once has a child stolen a paper piece while i wasnt looking and turned it to confetti... Or some one has thrown one in the bin thinking it was a crafting table off-cut!
 Boogaloo Bears
What a great thread!
I am going to look for a flexi ruler now - sounds like a great asset :lol:
Hugs
Lisa x
 Fulrfun Bears
Graph paper is my friend!